


Patient information: uses, side effects, how to take - Tyvaso
Instructions for Use Manual
TYVASO ®
(treprostinil)
INHALATION
SOLUTION
Contents
| Overview of your TYVASO Inhalation System | 4 |
| Introduction | 6 |
| Safety and general instructions | 8 |
| Buttons, indicators, and markings | 10 |
| Inhalation device display screens | 16 |
| Programming your TYVASO Inhalation System before use | 18 |
| Charging device before use | 20 |
| Setting your prescribed dose | 22 |
| Adjusting device's audio volume | 24 |
| Preparing and using your TYVASO Inhalation System for daily treatments | 26 |
| Prepare a proper environment | 28 |
| Gather supplies | 29 |
| Fill water chamber and medicine cup | 32 |
| Assemble inhalation device | 35 |
| Power on inhalation device | 40 |
| Inhale your medicine | 42 |
| Cleaning and Storing your TYVASO Inhalation System | 46 |
| Storing between sessions during the day | 48 |
| End of day cleaning | 52 |
| Recharging the battery | 57 |
| Weekly cleaning | 59 |
| Monthly Refill Kit | 60 |
| Replacing your devices | 61 |
| Help / More information about your TYVASO Inhalation System | 62 |
| Troubleshooting | 64 |
| Specifications | 76 |
| Electromagnetic compatibility (EMC) | 79 |
| Glossary | 87 |
| Warranty information | 90 |
Overview of your TYVASO Inhalation System
Section overview
This section introduces you to your TYVASO Inhalation System and provides important safety information about using your system.
| What you will need: |
|---|
| ▶ A clean place to review these instructions |
| ▶ TYVASO Inhalation System to refer to while reading instructions |
| What is covered in this section: | |
|---|---|
| A: Introduction | 6 |
| B: Safety and general instructions | 8 |
| C: Buttons, indicators, and markings | 10 |
| D: Inhalation device display screens | 16 |
Important:
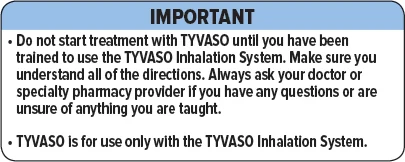
Do not start treatment with TYVASO until you have been trained to use the TYVASO Inhalation System. Make sure you understand all of the directions. Always ask your doctor or specialty pharmacy provider if you have any questions or are unsure of anything you are taught.
| A: Introduction |
Your doctor has prescribed TYVASO® (treprostinil) Inhalation Solution. Please see the accompanying Prescribing Information for important safety information on TYVASO.
TYVASO is breathed in (inhaled) using the TYVASO Inhalation System, which consists of the inhalation device and its accessories.
This Instructions for Use manual for the TYVASO Inhalation System provides important safety information. It is important that you read these instructions and the TYVASO Prescribing Information before setting up and using the TYVASO Inhalation System. If you have any questions, talk to your doctor or specialty pharmacy provider.
Before beginning treatment with TYVASO, you will receive either a Patient Starter Kit containing a 28-day supply of TYVASO or an Institutional Starter Kit containing a 4-day supply of medication.
Both kits include 2 complete inhalation devices (all accessories and supplies included). When you refill your prescription for TYVASO each month, you will receive a Refill Kit that contains a 28-day supply of TYVASO and new accessories. You will receive replacement devices every 2 years from your date of receipt of the TYVASO Inhalation System.
 CAUTION: Federal law restricts this device to sale by or on the order of a physician, or other licensed practitioner.
Important:
- Keep this Instructions for Use manual in a safe place where you can easily get to it for reference. For example, store the booklet in the TYVASO Inhalation System carrying case, along with your other supplies.
- TYVASO Inhalation System is intended solely for the delivery of TYVASO (treprostinil) Inhalation Solution. TYVASO is for administration only with the TYVASO Inhalation System.
| B: Safety and general instructions |
The TYVASO Inhalation System should be handled carefully. Take the following precautions and follow all instructions in this document to avoid injury and ensure proper use:
Delivering treatments:
- Read the instructions carefully and completely to prevent damage to your TYVASO Inhalation System and help you get the best results.
- This device should only be used on the order of your doctor or licensed healthcare practitioner.
- Conduct only the number of treatment sessions and inhalations you have been prescribed.
- Ensure the breath counter is correctly programmed prior to beginning a treatment (see page 22).
- Turn off the device when not in use.
- Do not use the device with an anesthetic breathing system or ventilator breathing system.
- Use only the supplies provided in the Starter Kit and Monthly Refill Kit for correct device function.
Handling the device:
- Do not peel or remove the labels from the device.
- Do not drop the device.
- The device does not include internal, replaceable parts. Do not attempt to open the device, modify the device, or remove device labeling.
Your environment:
- Do not leave the device alone with a small child.
- Do not immerse the device in water or other liquids, or place in dishwasher.
- Do not place any system components in a microwave, conventional oven, or dishwasher.
- Do not use the device near flammable liquids and materials or heated surfaces.
- Do not place the device or use the device in the presence of strong electric or magnetic fields (e.g., microwave oven, magnetic imaging equipment).
- Wireless communications equipment (e.g., cell phone) can affect operation of the device and should be kept at least a distance of 3.3 meters (about 11 feet) away while using the device.
- If the device performance is affected by exposure to any conditions listed here, see the Troubleshooting section, or contact your healthcare provider or specialty pharmacy provider.
| C: Buttons, indicators, and markings |
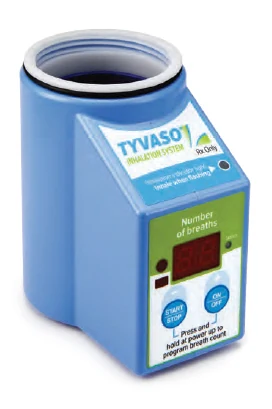
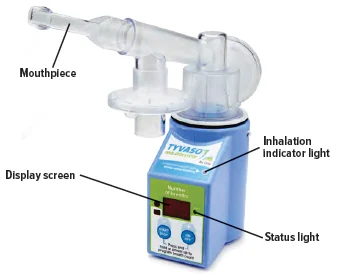
Inhalation device
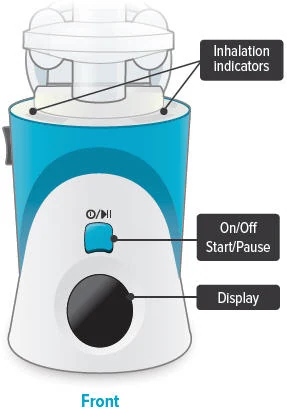
Inhalation indicator lights
Lights on top of device flash green when you should inhale.
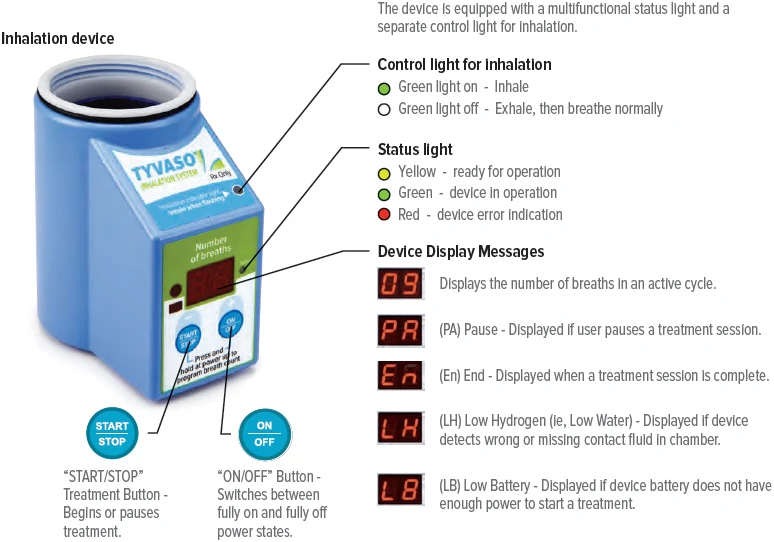 On/Off, Start/Pause (blue) button
Press and hold to power device on or off. Once device is on, press and immediately release (do not hold down) to start or pause treatment.
Device Display
Provides instructions and device information.

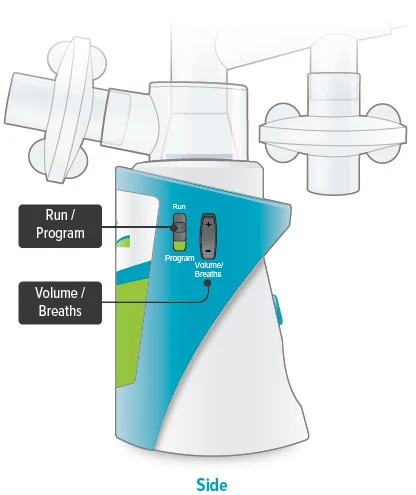
Run / Program switch
Slide up to Run mode when you are ready to deliver your dose. Slide down to Program mode to program the number of breaths for your dose.
Volume / Breaths toggle button
When set to Run mode, push + to increase beeping volume, or push - to decrease beeping volume.
When set to Program mode, push + to increase the number of breaths, or push - to decrease the number of breaths required for each dose.

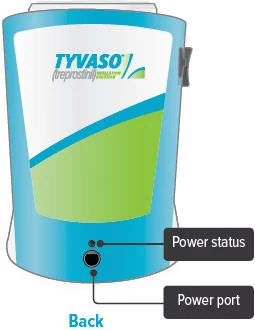
Power status light
 Lights green when power is connected and battery is charging.
Power port
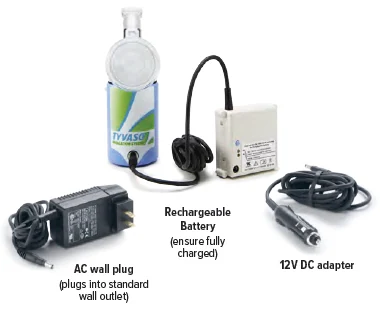
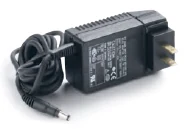
Port for plugging into a power source using the AC wall plug.

| Additional device markings | |
|---|---|
 | Manufacturer. Indicates the medical device manufacturer. (Symbol 5.1.1 of ANSI/AAMI/ISO 15223-1: 2012 Medical devices - symbols to be used with medical devices labels, labeling, and information to be supplied - part 1: general requirements) |
 | Equipment should not be disposed of in the trash. (Figure 1 of BS EN 50419:2006 - Marking of Electrical and Electronic Equipment in accordance with Article 11(2) of Directive 2002/96/EC (WEEE)) |
 | Catalogue number. Indicates the manufacturer's catalogue number so that the medical device can be identified. (Symbol 5.1.6 of ANSI/AAMI/ISO 15223-1: 2012 Medical devices - symbols to be used with medical devices labels, labeling, and information to be supplied - part 1: general requirements) |
 | Serial number. Indicates the manufacturer's serial number so that a specific medical device can be identified. (Symbol 5.1.7 of ANSI/AAMI/ISO 15223-1: 2012 Medical devices - symbols to be used with medical devices labels, labeling, and information to be supplied - part 1: general requirements) |
 | Consult instructions for use. Please read the accompanying instructions and labels for important information regarding the TYVASO Inhalation System. (Symbol 5.4.3 of ANSI/AAMI/ISO 15223-1: 2012 Medical devices - symbols to be used with medical devices labels, labeling, and information to be supplied - part 1: general requirements) |
 | The TYVASO Inhalation System has a Type BF Applied part. Type BF Applied parts comply with specific requirements to provide protection against shock and are not suitable for direct cardiac applications. (Symbol 5333 of IEC 60417 Database Snapshot - Graphical symbols for use on equipment) |
 | The TYVASO Inhalation System requires a 14V DC power supply. Use only the power supply intended for the TYVASO Inhalation System. (Direct Current, Symbol 5031 of IEC 60417 Database Snapshot - Graphical symbols for use on equipment) |
 | The TYVASO Inhalation System complies with the requirements of Protection Class II. Class II equipment provides additional precautions, over and above basic insulation, to provide protection against electric shock. (Class II equipment, Symbol 5172 of IEC 60417 Database Snapshot - Graphical symbols for use on equipment) |
 | The TYVASO Inhalation Device provides level 2 solid particle protection and level 2 liquid ingress protection per IEC 60529 specifications. |
 | The TYVASO Inhalation System should only be used on the order of your doctor or licensed healthcare provider. (Symbol statement as provided under 21 CFR 801.109(b)(1)) |
 | Power stand by. Indicates the control for powering on and off the TYVASO Inhalation System. ("On" / "Off", Symbol 5010 of IEC 60417 Database Snapshot - Graphical symbols for use on equipment) |
 | Start/Pause. Indicates the control for starting a treatment session once the device is powered on, and for pausing a treatment once a treatment session has started. (Play and Pause, Symbols 5107B and 5111B, respectively, of IEC 60417 Database Snapshot - Graphical symbols for use on equipment) |
| D: Inhalation device display screens | |||
|---|---|---|---|
 |  |  |  |
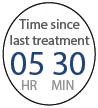
Splash screen Device name and software version | Last Treatment Time since your last treatment | Program Breaths Number of breaths set in Program mode | Adjust Volume Audio volume level set in Run mode |
 |  |  |  |
Breaths Left Number of breaths left in a current dose | Exhale Prompt to exhale during a dose | Inhale Prompt to inhale during a dose | Done Treatment session is complete |
 |  |  | |
Pause You have paused a treatment session | Call Support Device is not working, call your specialty pharmacy provider for support | ||
 |  | ||
Add Water Wrong or missing fluid in water chamber | Charge Battery Battery not charged enough to deliver treatment | Status icons Icons that might appear at bottom of the screen | |
Programming your TYVASO Inhalation System before use
Section overview
This section provides instructions for charging your device, setting your dose, and adjusting the device's audio volume before you use the device for a treatment.
| What you will need: |
|---|
| ▶ A clean place to work with the device |
| ▶ TYVASO Inhalation Device |
| ▶ The number of breaths your doctor prescribed for each dose |
| What is covered in this section: | |
|---|---|
| A: Charging device before use | 20 |
| B: Setting your prescribed dose | 22 |
| C: Adjusting device's audio volume | 24 |
Important:
Do not start treatment with TYVASO until you have been trained to use the TYVASO Inhalation System. Make sure you understand all of the directions. Always ask your doctor or specialty pharmacy provider if you have any questions or are unsure of anything you are taught.
| A: Charging device before use |
1. Plug in device
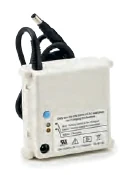
Important: A new device might not be fully charged when you receive it. Always charge the device before you first use it. You can also charge the device overnight, when not in use and in between uses.
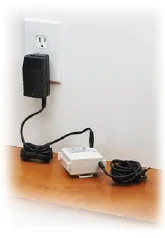
Plug the AC wall plug's white connector into the port on the back of the inhalation device. Then, plug the AC wall plug into the wall outlet.
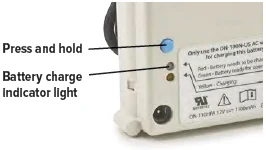
The power status light above the port will light green when properly plugged in.
2. Check the battery's status
Make sure the Run / Program switch is set to Run. Press and hold the blue button to power on the device.
The battery icon at the bottom of the screen indicates battery status.
When you are done checking the battery status, press and hold the On/Off button until the display screen shuts off (note: letting the button go before the screen shuts off will start a treatment session).
| If there is not enough charge to conduct a treatment session, "Charge battery" appears on screen. | |
| B: Setting your prescribed dose |
Your doctor will prescribe the number of breaths you should take in each treatment session. You should program this number into the inhalation device before you use the device.
1. Switch to Program
Slide the Run / Program switch on the side of the device down to Program mode. In Program mode you enter the prescribed number of breaths for each dose. You cannot begin a treatment in Program mode.
2. Power on
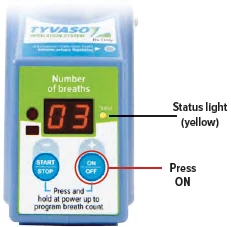
Press and hold the On/Off button until the display screen turns on. The Program Breaths screen appears. The number of breaths currently set for each treatment session will flash.
3. Set breaths
Use the Volume / Breaths toggle button to enter your prescribed number of breaths onto the program screen.
4. Switch to Run
Slide the Run / Program switch up to Run mode. Make sure your new breath count appears on screen.
5. Power off
Press and hold the On/Off button until the display screen shuts off (note: letting the button go before the screen shuts off will start a treatment session).
Note: You will not need to program the breath count again, unless your prescribed number of breaths changes.
| C: Adjusting device's audio volume |
You can use the Volume / Breaths toggle button to adjust the volume of the audible signals (beeps) that the device provides as feedback during treatment sessions.
1. Switch to Run
Slide the Run / Program switch up to Run mode, if it is not in this position already.
2. Power on
Press and hold the On/Off button until the display screen turns on, if it is not already turned on. The programmed number of breaths will appear with the words "Breaths left" and the battery icon at the bottom.
3. Adjust volume
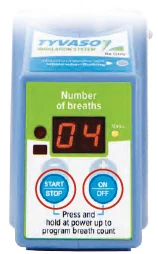
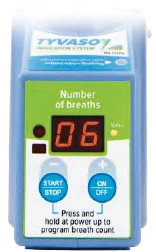
With the Run / Program switch in the Run position, press the Volume / Breaths toggle button to access the Adjust Volume screen. Push + on the Volume / Breaths toggle button to increase beeping volume, or push - to decrease beeping volume.
 | ||
 |  |  |
| audio off | mid-level volume | maximum volume |
4. Power off
After adjusting the beeping volume up or down, the screen will display your new setting for a couple of seconds then return to the screen displaying the breaths left.
Press and hold the On/Off button until the display screen shuts off (note: letting the button go before the screen shuts off will start a treatment session).
Preparing and using your TYVASO Inhalation System for daily treatments
Section overview
This section provides instructions for preparing and using your TYVASO Inhalation System for daily treatments.
| What you will need: |
|---|
| ▶ A clean place to take your medicine |
| ▶ TYVASO Inhalation device |
| ▶ TYVASO Inhalation supplies |
| ▶ One ampule of TYVASO Inhalation Solution |
| What is covered in this section: | |
|---|---|
| A: Prepare a proper environment | 28 |
| B: Gather supplies | 29 |
| C: Fill water chamber and medicine cup | 32 |
| D: Assemble inhalation device | 35 |
| E: Power on inhalation device | 40 |
| F: Inhale your medicine | 42 |
Important:
Before using the TYVASO Inhalation System, you should:
- Wash your hands.
Make sure the device is resting on a stable, flat surface during assembly.
| A: Prepare a proper environment |
Follow these important instructions before setting up your treatment:
- Use the device in a quiet, distraction-free area.
- Try to use the device at times when your treatment will not be interrupted. If needed, you can pause your treatment (see page 44).
- Use the device in a comfortable space where you can stand or sit in an upright position.
- Use the device in an area where you can access a power source if you need to use the AC wall plug.
- The TYVASO Inhalation System is recommended for use indoors.
- Use the device in an area that provides enough space for the TYVASO Inhalation System and its accessories.
- Gather all necessary supplies on a stable, flat surface for assembly (see page 29 for list of supplies).
- Store the inhalation device at 15°C to 30°C (59°F to 86°F). Use at 15°C to 25°C (59°F to 77°F).
- Use the device in a well-lit area where you can clearly read these instructions, labels on the device, and the device screen.
| B: Gather supplies |
Gather the following supplies before starting treatment. Use only the supplies provided in the starter kit and monthly refill kit for correct device function. Prior to use, inspect each part and do not use parts if they appear damaged or dirty.
 |  | |
Inhalation device Powered off | TYVASO ampules Use 1 ampule per day | Water level cup with 45 mL of distilled water |
 |  |  |
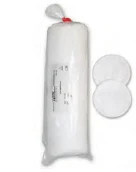
Filter membranesThese accessories are replaced every month. Replacement accessories are included in the Monthly Refill Kit. Use 2 per day | Medicine cups Use 1 per day | Dome assembly |
 |  |  |
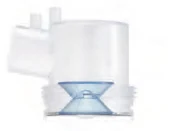
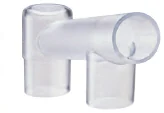
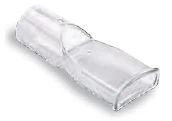
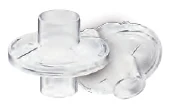
| Mouthpiece | Inhalation piece | 2 filter shells |
 |  |  |
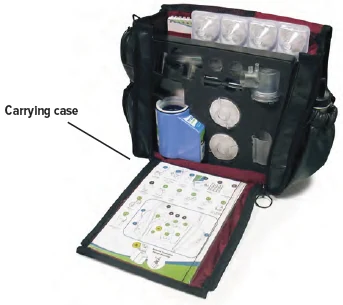
2 Plugs (Used when storing the device) | Carrying case | Pen or pencil (not provided) to record your treatment |
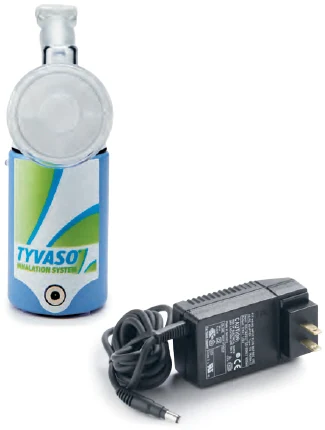 |  |  |
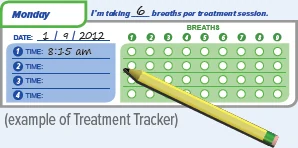
| Distilled water carrier | AC wall plug | Treatment Tracker Example |
| C: Fill water chamber and medicine cup |
Important:
Wash your hands
- Unplug device when filling to avoid damage to cords or connectors.
- Only use distilled water in the device. Distilled water is highly purified water that is required for the device to function properly. If you use another type of water (such as bottled or tap water), the device might not function properly. You can purchase distilled water at most grocery stores and pharmacies.
1. Fill water chamber
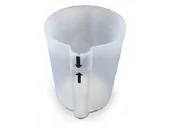
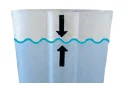
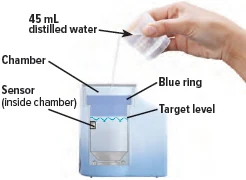
Fill the water level cup with distilled water up to the arrow markers on the water cup. Use fresh distilled water each day (i.e., do not use water left in the water chamber from the previous day). Pour the distilled water into the water chamber.
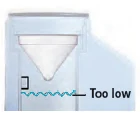
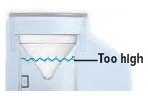
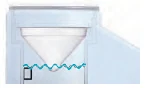
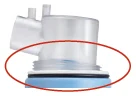
Make sure the water level is above the upper, silver sensor and below the blue ring in the water chamber (about 45 mL of distilled water).
Do not overfill the water chamber, or else the medicine cup might not fit correctly.
2. Place medicine cup
Obtain 1 new medicine cup and inspect it. Do not use a medicine cup that is damaged (e.g., cracked or contains holes or dents), dirty, or was used before.
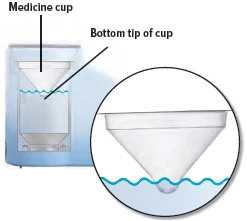
Place the empty medicine cup into the water chamber of the device, making sure that the cup's bottom tip is in the distilled water.
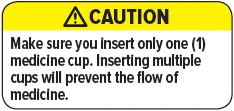
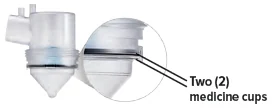
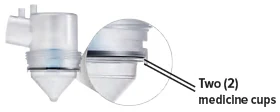
CAUTION: Make sure you place only 1 medicine cup. Placing multiple cups will prevent the flow of medicine.
3. Gather one ampule
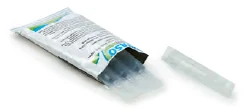
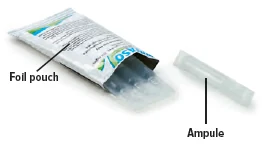
Carefully cut open the top of the foil pouch, making sure not to cut the ampules. Each pouch contains 4 ampules. Remove 1 ampule of TYVASO.
Keep unused ampules in the foil pouch because the TYVASO medicine is sensitive to light. Write the date you first opened the pouch on the foil pouch.
One ampule contains enough medicine for 1 day of treatment no matter how many breaths your doctor has prescribed.
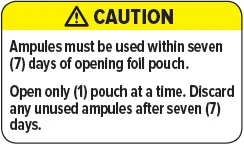
CAUTION: Ampules must be used within 7 days of opening foil pouch. Open only 1 pouch at a time. Throw away (discard) any unused ampules after 7 days.
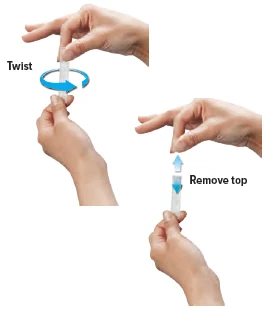
4. Open ampule
Gently hold the ampule in the upright (top up) position and twist off its top.
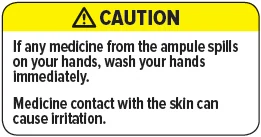
CAUTION: If any medicine from the ampule spills on your hands, wash your hands right away. Medicine contact with the skin can cause irritation.
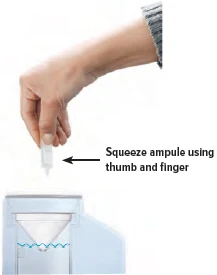
5. Squeeze ampule
Point the ampule straight down toward the medicine cup's center to avoid spills.
Gently squeeze the medicine out of the ampule into the medicine cup. Squeeze until it is empty. Check to see that all of the medicine is in the medicine cup.
| D: Assemble inhalation device |
Important: Do not force parts together.
The TYVASO Inhalation System is designed so the parts only fit together properly one way. When the device is assembled correctly, the parts should fit together easily.
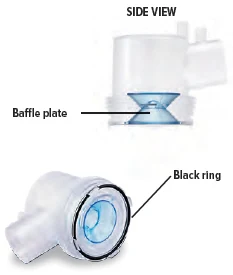
1. Check dome assembly
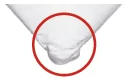
Visually check to make sure the black ring is securely placed in the dome assembly. The black ring should look like it does in the pictures below.
If the black ring is loose or missing, do not use the dome assembly. Throw it away and get a new one. If you need to order a new dome assembly, contact your specialty pharmacy provider.
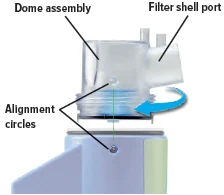
2. Attach dome assembly
Align the raised circle on the side of the dome assembly with the raised circle on the side of the device.
Push down and screw the dome assembly onto the device clockwise (right) until the filter shell port is tight and pointed to the back of the device. You will hear clicks (or a slight crunching sound) as the dome assembly presses down on the medicine cup.
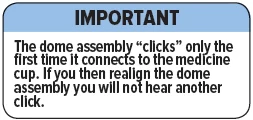
Important: The dome assembly "clicks" only the first time it connects to the medicine cup. If you then realign the dome assembly you will not hear another click.
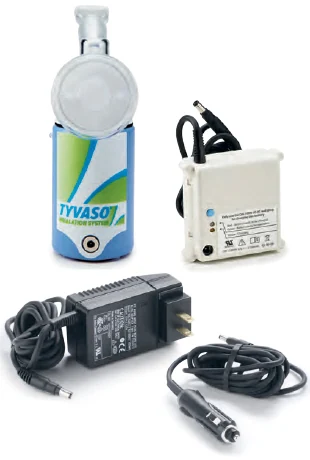
3. Install new filter membrane
Each day you will need to use a new filter membrane in each filter shell.
Note: New filter shells come with fresh filter membranes already installed.
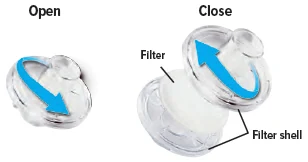
| To install a new filter membrane: |
| ▶ a. Open the filter shell by unscrewing the 2 halves. |
| ▶ b. Place a new filter membrane in 1 of the filter shell halves. |
| ▶ c. Close the filter shell by screwing the 2 halves together until you can twist no further. |
| ▶ d. Repeat steps a-c for second filter shell. |
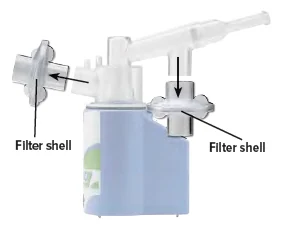
4. Attach filter shells
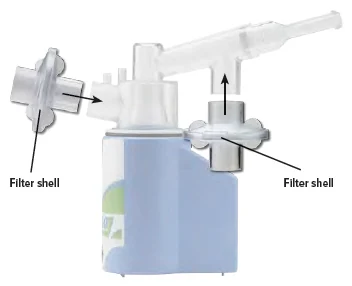
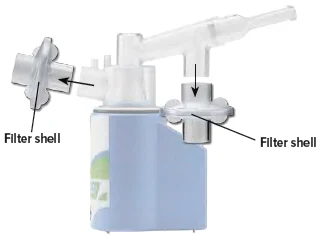
Insert 1 filter shell into the filter shell port on the side of the dome assembly and insert the second filter shell into the port on the bottom of the inhalation piece. The filter shells are the same and can be used in either port. You can turn the filter shells around to fit into the ports, as needed.
Make sure to insert filter shells straight into ports, not at an angle.
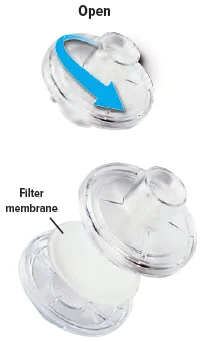
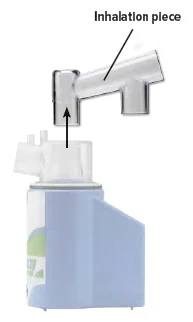
5. Insert inhalation piece
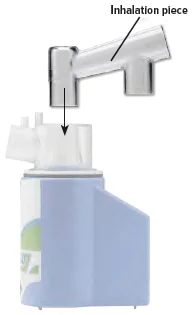
Insert the inhalation piece with attached filter shell into the upper opening of the dome assembly and turn it toward the front of the device. Gently push down the inhalation piece to make sure it is securely inserted in the dome assembly.
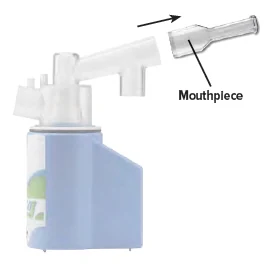
6. Insert mouthpiece
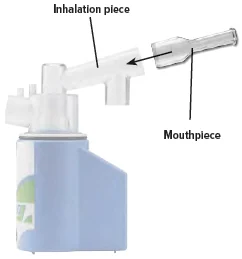
Carefully insert the mouthpiece into the inhalation piece.
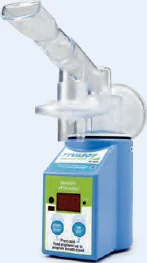
7. Check assembled device
When the device is fully assembled, it should look like it does below. Slightly turn the inhalation piece so you can see the display screen, which provides important prompts during your treatment.
Important: Do not use device if you see liquid leaking from bottom of the device.
| E: Power on inhalation device |
1. Power on device
Press and hold the On/Off button until the screen turns on and the device beeps once.
The screen will display the splash screen, then the time since your last treatment, then the current breaths programmed for each dose.
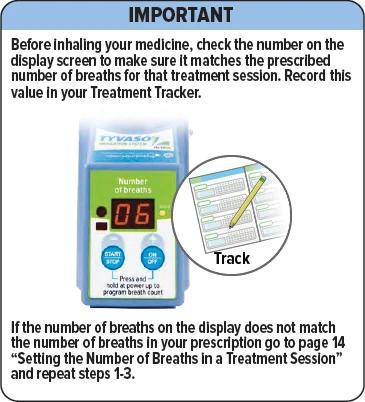
Important: Make sure the number on screen above "Breaths left" matches the prescribed number of breaths for that treatment session. If it does not match, see page 22 for instructions on setting the number of breaths for a treatment session.
2. Plug in device, if needed
If the device's internal battery is too low to deliver a full treatment, the screen will display an instruction to plug in the power to charge the device battery. If the battery is fully depleted, the screen will not turn on.
You can charge the battery at any time, before the screen displays "Charge battery."
You can conduct a treatment session with the power plugged in. First, plug the AC wall plug's white connector into the port on the back of the inhalation device. Then, plug the AC wall plug into the wall outlet. The power status light above the port will light green when properly plugged in.
| F: Inhale your medicine |
1. Before starting, confirm treatment
You will breathe in (inhale) TYVASO during 4 treatment sessions each day (evenly spaced during your waking hours). During each treatment session, you will take a series of breaths through the mouthpiece of the TYVASO Inhalation System.
Before inhaling your medicine, ensure the Run/Program switch is in the 'Run' position, and make sure the number displayed on screen matches your prescribed number of breaths for that treatment session. During the treatment the device counts down each breath after a set time interval. Once you complete all breaths, record the breath number in your Treatment Tracker.
Important: If the number of breaths displayed does not match the number of breaths in your prescription, see page 22 "Setting your prescribed dose" and repeat steps 1-4.
2. Hold the device upright
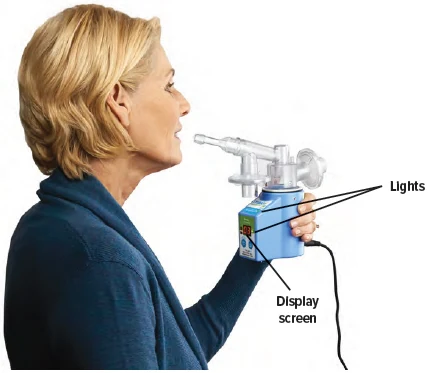
Hold the device upright and stand or sit in an upright position as shown below. Avoid covering the bottom of the device so that the audio speaker is not blocked.
Make sure you can see the display screen and lights clearly and that your hands do not cover the display screen or lights while holding device. If needed, you can move the inhalation piece and mouthpiece slightly to either side to see the screen and lights better.
See next page to start treatment.
Inhalation tips:
Technique:
When breathing each TYVASO treatment, be sure to keep the device level, directing the flow of medicine into the throat and not toward the roof of the mouth.
Seal your lips around the mouthpiece to ensure that you can inhale the full amount of TYVASO after it is produced by the device.
Inhalation:
Each breath should last approximately 3 seconds, breathing "normal full breaths." Do not hold your breath. Remove your lips from the mouthpiece, breathe out (exhale) normally and prepare for the next breath.
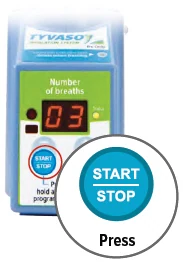
3. Press blue button to start treatment
If you need to pause treatment, you can press and immediately release (do not hold down) the blue button. Press the button again and immediately release to resume treatment. (Note: If you do not resume treatment after pausing, power off device.)
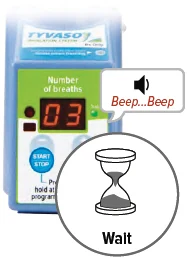
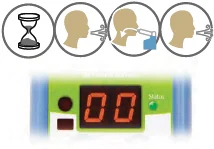
4. Wait
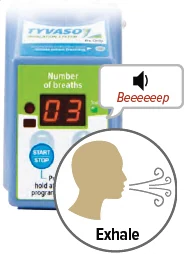
Look at the display screen for cues. Wait until you hear 2 short beeps. When you hear 1 long beep, exhale to prepare to inhale.
5. Inhale
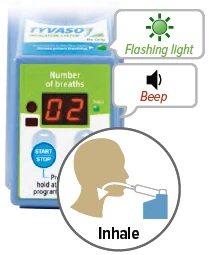
When you hear 1 short beep and the indicator lights flash green, place your lips securely around the mouthpiece and inhale for 3 seconds. When lights stop flashing, remove lips from mouthpiece and exhale normally.
6. Repeat for each breath left
The screen will decrease the number of breaths left by 1. Repeat steps 4 and 5 for the number of prescribed breaths.
7. Finish session
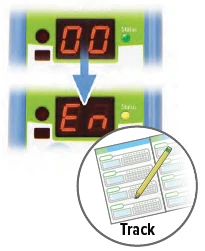
After displaying the last breath sequence, the green Done screen appears, you will hear a beep, and your treatment is done.
If the device is left in the "✓ Done" mode for more than 60 seconds, it will turn off automatically.
8. Record breaths, turn off device
Record the number of breaths you inhaled on the Treatment Tracker.
Press and hold blue button until screen turns off.
CAUTION: If medicine does not appear to be flowing properly, the system might be set up incorrectly. See "Troubleshooting", starting on page 64 for details.
Cleaning and Storing your TYVASO Inhalation System
Section overview
This section provides instructions for storing your TYVASO Inhalation System after each treatment and daily and weekly cleaning.
There is also information about your monthly refill kits, replacing your device, and recharging the device's battery.
| What you will need: |
|---|
| ▶ A clean place to work with the device |
| ▶ TYVASO Inhalation device |
| ▶ TYVASO Inhalation supplies |
| What is covered in this section: | |
|---|---|
| A: Storing between sessions during the day | 48 |
| B: End of day cleaning | 52 |
| C: Recharging the battery | 57 |
| D: Weekly cleaning | 59 |
| E: Monthly Refill Kit | 60 |
| F: Replacing your devices | 61 |
Important:
For further support, you can:
- Fill out and refer to your emergency contact information on the back of this Instructions for Use manual.
- Call 1-844-UNITHER (1-844-864-8437) for questions and information, or to report an adverse reaction.
| A: Storing between sessions during the day |
If you have more treatment sessions left in the day, perform the steps in this section.
If you have completed your last treatment session of the day, skip to "End of day cleaning" on page 52.
Be sure to pack all parts, including the AC wall plug, in the carrying case whenever transporting your device.
1. Disconnect AC wall plug
(if it is currently connected)
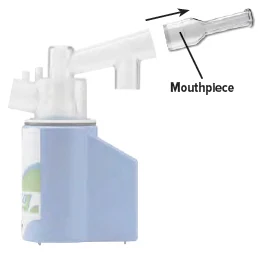
2. Remove mouthpiece
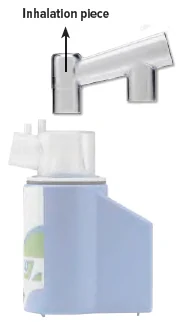
3. Remove inhalation piece
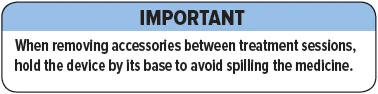
Important: When removing accessories between treatment sessions, hold the device by its base to avoid spilling the medicine.
4. Remove both filter shells
Note: Do not remove the filter membranes from filter shells until after the last treatment session of the day.
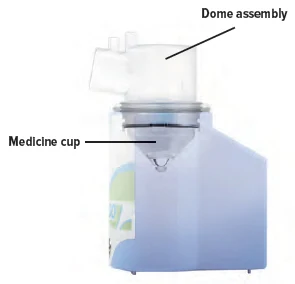
5. Leave dome assembly
Leave dome assembly and medicine cup (with the medicine still in it) attached to the device.
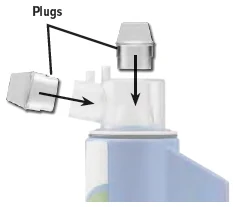
6. Place plugs in dome assembly
Insert a plug into each of the 2 open holes on the dome assembly to prevent the medicine from spilling out.
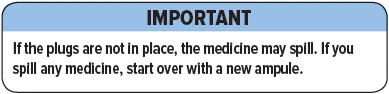
Important: If the plugs are not in place, the medicine may spill. If you spill any medicine, discard remaining medicine and start your next treatment with a new ampule.
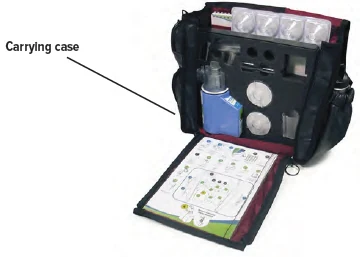
7. Store in carrying case
You can store the inhalation device with the plugged dome assembly and disassembled accessories in the carrying case between treatment sessions.
Keep the carrying case upright while inserting the device and components so that water and medicine does not spill out of the device.
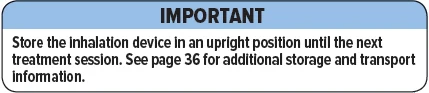
Important: Store the inhalation device in an upright position until the next treatment session. See "Specifications" on page 76 for additional storage and transport information.
| B: End of day cleaning |
If you have completed your last treatment session of the day, perform the steps in this section.
If you have more treatment sessions left in the day, refer back to "Storing between sessions during the day" on page 48.
1. Disconnect AC wall plug
(if it is currently connected)

2. Remove mouthpiece
3. Remove inhalation piece with attached filter shell
4. Remove both filter shells
5. Discard filter membranes
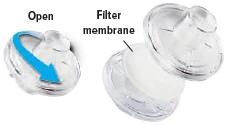
Open filter shells by twisting in opposite directions. Remove and discard used filter membranes in the trash.
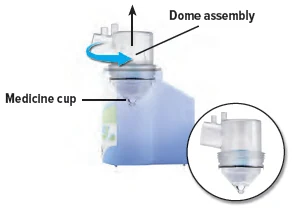
6. Remove dome assembly
Remove the dome assembly by turning it counter-clockwise (to the left). The medicine cup should stay attached to the dome assembly.
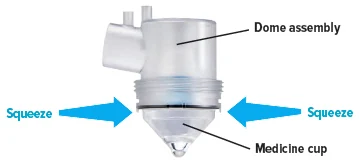
7. Remove medicine cup
Remove the medicine cup by gently squeezing on the sides where it is attached to the dome assembly.
Be careful not to spill any leftover medicine.
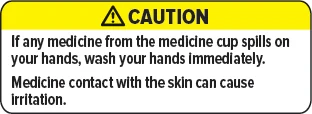
CAUTION: If any medicine from the medicine cup spills on your hands, wash your hands immediately. Medicine contact with the skin can cause irritation.
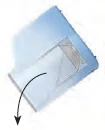
8. Empty medicine cup
Empty any leftover medicine in the medicine cup into a waste basket, and discard the medicine cup.
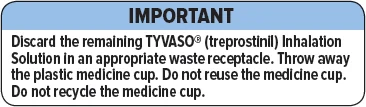
Important: Discard remaining TYVASO® (treprostinil) Inhalation Solution in an appropriate waste receptacle. Discard plastic medicine cup in the trash.
Do not reuse or recycle medicine cup.
9. Empty and clean device
Empty distilled water from water chamber and let inhalation device air dry upside down. You can wipe the water chamber with a soft cloth or paper towel to remove any remaining water.

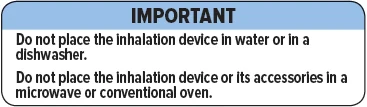
Important: Do not place the inhalation device in water or in a dishwasher.
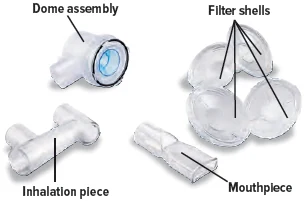
10. Clean accessories
Clean accessories (pictured below) by hand in mild, soapy, warm water, then rinse them thoroughly with water. Allow accessories to air dry.
 |  |
| Dome assembly | Inhalation piece |
 |  |
| Mouthpiece | Filter shells |
Important: Do not place the inhalation device or its accessories in a microwave, conventional oven, or dishwasher.
11. Store components
Once all the items are dry, you can store the filter shells, inhalation piece, mouthpiece, dome assembly, AC wall plug, and inhalation device in the carrying case until the next day's treatment sessions.
You can also recharge the device for the next day of use (see page 57).

| C: Recharging the battery |
1. Checking the battery's status
You can recharge your battery at any time. Press and hold the blue button to power on the device to check battery status. Make sure the Run / Program switch is set to Run.
- The battery icon at the bottom of the screen indicates battery status:

- "Charge battery" appears on screen if there is not enough charge to conduct a treatment session.
Important: Always charge the device before you first use it. You should also charge the device when not in use and in between uses.
2. Charging the battery
Plug the AC wall plug's white connector into the port on the back of the inhalation device. Then, plug the AC wall plug into the wall outlet. The power status light above the port will light green when properly plugged in.
The device battery might take up to 8 hours to fully charge.
If the device is powered on, the battery charging icon appears next to the battery icon at the bottom of the screen.
 |
| Battery charging icon |

| D: Weekly cleaning |
Clean the device once a week to help avoid corrosion and leaks and to keep your device working properly.
Once a week, use a clean, dry cloth to wipe the interior of the water chamber. Make sure to wipe the 2 silver sensors and the white disc in the bottom of the water chamber.

You may wipe the exterior of the device with a damp cloth if the lights or buttons become difficult to see.

| E: Monthly Refill Kit |
Once a month, you will receive a refill kit that will come with a new set of accessories from your specialty pharmacy provider.
- Inspect the shipment to be sure all parts are included.
- Once the new kit has arrived, discard the used dome assembly, inhalation piece, mouthpiece, filter shells, and plugs.
- Do not recycle the used accessories.
 |  | |
| Dome assembly | 2 filter shells | |
 |  |  |
| Mouthpiece | Inhalation piece | 2 plugs |
 |  | |
| Filter membranes | Medicine cups | |
| F: Replacing your devices |
The inhalation devices should be replaced every 2 years from your first day of use. Replacement inhalation devices will be supplied by your specialty pharmacy provider.
When you receive a new inhalation device your specialty pharmacy provider will provide instructions for returning the old device.
Help / More information about your TYVASO Inhalation System
Section overview
This section provides additional information about your device. Use this section to troubleshoot difficulties you have with the device, or to learn more about the device's specifications and warranty.
| What you will need: |
|---|
| ▶ Access to a phone (to contact support if troubleshooting steps do not resolve the problem) |
| ▶ A clean place to work with the device |
| ▶ TYVASO Inhalation Device or supplies, as needed |
| What is covered in this section: | |
|---|---|
| A: Troubleshooting | 64 |
| B: Specifications | 76 |
| C: Electromagnetic compatibility (EMC) | 79 |
| D: Glossary | 87 |
| E: Warranty information | 90 |
Important:
For further support, you can:
- Fill out and refer to your emergency contact information on the back of this Instructions for Use manual.
- Call 1-844-UNITHER (1-844-864-8437) for questions and information, or to report an adverse reaction.
| A: Troubleshooting |
| Problem | Possible causes | Corrective actions |
|---|---|---|
Charge Battery screen appears | Low battery | Charge the device battery by attaching the AC wall plug to an outlet. You can conduct a treatment session with the device plugged in. |
AC wall plug not properly connected 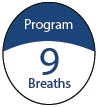 | Ensure that the plug adapter piece (the detachable piece with the metal prongs) is securely attached to the AC wall plug. Then, make sure the AC wall plug is properly connected to an outlet and device. The status lights on the back of the AC wall plug and device should light green. You can conduct a treatment session with the device plugged in. | |
AC wall plug is defective 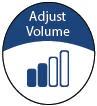 | Use the replacement AC wall plug. Confirm that status light on AC wall plug is green when plugged in. You can conduct a treatment session with the device plugged in. | |
| If device still does not function after taking corrective actions listed above, contact your specialty pharmacy provider for assistance. | ||
Screen does not turn on 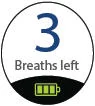 | Device battery is completely empty | Charge the device battery by attaching the AC wall plug to an outlet. You can conduct a treatment session with the device plugged in. |
AC wall plug not properly connected 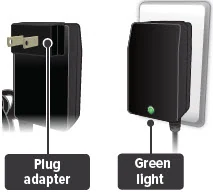 | Ensure that the plug adapter piece (the detachable piece with the metal prongs) is securely attached to the AC wall plug. Then, make sure the AC wall plug is properly connected to an outlet and device. The status lights on the back of the AC wall plug and device should light green. You can conduct a treatment session with the device plugged in. | |
AC wall plug is defective 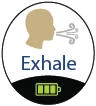 | Use the replacement AC wall plug. Confirm that status light on AC wall plug is green when plugged in. You can conduct a treatment session with the device plugged in. | |
| If device still does not function after taking corrective actions listed above, contact your specialty pharmacy provider for assistance. | ||
Call Support screen appears | Temporary device failure. | If device is plugged in, unplug device and wait for the device to power off. Power on device from internal battery and check that Call Support screen does not reappear. Continue taking breaths to complete the treatment session. |
| If device still does not function after taking corrective actions listed above, contact your specialty pharmacy provider for assistance. | ||
| Loss of power during treatment | Device is disconnected from power source and battery is empty | Reconnect device to power source and confirm the power status light on back of device is green (battery is charging). Press and hold the blue On/Off button to turn on the device. The display will show how many breaths are left in that treatment session. Press and immediately release (do not hold down) the blue button again to continue your treatment session. |
| Power source is temporarily disrupted (for example, electricity interruption due to a storm) | Reconnect device to power source and confirm the power status light on back of device is green (battery is charging). Press and hold the blue On/Off button to turn on the device. The display will show how many breaths are left in that treatment session. Press and immediately release (do not hold down) the blue button again to continue your treatment session. | |
| If device still does not function after taking corrective actions listed above, contact your specialty pharmacy provider for assistance. | ||
Add Water screen appears | Water chamber is empty or distilled water level is too low. 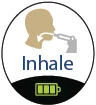 | Unplug device, if plugged in, and power off device. Remove dome assembly (making sure not to spill medicine) and place it aside, keeping it upright. Then empty water chamber. Refill water chamber with distilled water using water level cup (see page 32). Reassemble device. Power the device on and continue treatment. |
| The distilled water is too pure. | Unplug device, if plugged in, and power off device. Remove dome assembly (making sure not to spill medicine) and place it aside, keeping it upright. Then empty water chamber. Add 1 teaspoon of tap water to the water level cup. Fill rest of cup with distilled water up to level between the 2 arrow markings on cup (see page 32). Pour cup's contents into water chamber. Reassemble device. Power the device on and continue treatment. | |
Water level sensors have a thin layer of build-up  | Unplug device, if plugged in, and power off device. Remove dome assembly (making sure not to spill medicine) and place it aside, keeping it upright. Then empty water chamber. Clean sensors and interior surfaces of water chamber with a clean cloth. Refill water chamber with distilled water using water level cup (see page 32). Reassemble device. Power the device on and continue treatment. | |
| If device still does not function after taking corrective actions listed above, contact your specialty pharmacy provider for assistance. | ||
| No "click" (or crunch) was heard when attaching the dome assembly | No medicine cup in the water chamber of the device | Unplug device, if plugged in, and power off device. Place an empty medicine cup into the water chamber of the device and fill it with 1 ampule of TYVASO. Reassemble device. Power the device on and continue treatment. |
Multiple medicine cups attached to the dome assembly 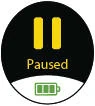 | Unplug device, if plugged in, and power off device. Remove and dispose of all medicine cups in the device. Place a single, new medicine cup into device water chamber and fill with 1 ampule of TYVASO. Reassemble device. Power the device on and continue treatment. | |
| Dome assembly is not securely in place | Unplug device, if plugged in, and power off device. Align the raised circle on the side of the dome assembly with the raised circle on the side of the device. | |
 | Push down and screw the dome assembly onto the device clockwise (right) until the filter shell port is tight and pointed to the back of the device and the raised circles line up again. You will hear clicks (or crunch sound) as the dome assembly presses down on the medicine cup. Reassemble device. Power the device on and continue treatment. | |
| If device still does not function after taking corrective actions listed above, contact your specialty pharmacy provider for assistance. | ||
| No medicine comes out of the device during a treatment session | No TYVASO® (treprostinil) Inhalation Solution in the medicine cup 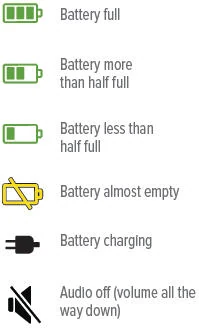 | Unplug device, if plugged in, and power off device. Fill medicine cup with 1 ampule of TYVASO. Reassemble device. Power the device on and continue treatment. |
Damaged medicine cup  | Unplug device, if plugged in, and power off device. Remove and dispose of the medicine cup in the device. Empty the water chamber then refill it with 45 mL of distilled water (see page 32). Place a single, new medicine cup into water chamber and fill with 1 ampule of TYVASO. Reassemble device. Power the device on and continue treatment. | |
Distilled water level in the water chamber is too high 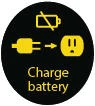 | Unplug device, if plugged in, and power off device. Remove dome assembly (making sure not to spill medicine) and place it aside, keeping it upright. Empty the water chamber then refill it with 45 mL of distilled water (see page 32). Reassemble device. Power the device on and continue treatment. | |
Multiple medicine cups attached to the dome assembly 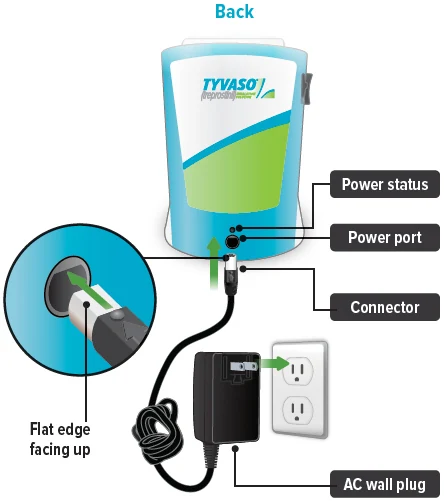 | Unplug device, if plugged in, and power off device. Remove and dispose of all medicine cups in the device. Place a single, new medicine cup into water chamber and fill with 1 ampule of TYVASO. Reassemble device. Power the device on and continue treatment. | |
| If device still does not function after taking corrective actions listed above, contact your specialty pharmacy provider for assistance. | ||
| Difficult to breathe in medicine through the mouthpiece | Filter membrane is clogged 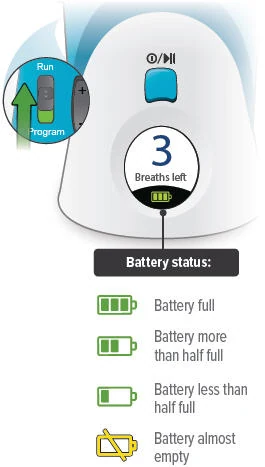 | Unplug device, if plugged in, and power off device. Replace both filter membranes (see page 37). Reassemble device. Power the device on and continue treatment. |
| If device still does not function after taking corrective actions listed above, contact your specialty pharmacy provider for assistance. | ||
| B: Specifications |
| Inhalation Device | |
|---|---|
| Model | TD-300/A |
| Size | 3.5" × 3.2" × 4.7" (90 × 82 × 120 mm) |
| Weight, inhalation device | 365 g (12.8 oz) |
| Types of power supply | AC wall plug, 120 V, 60 Hz |
| Power input | 14 V DC, 1.1 A maximum |
| Operating power consumption | 18 Watt maximum |
| Ultrasonic frequency | 2.4 MHz (nominal) |
| Nebulization rate | 0.50 - 0.55 mg/min (0.9% Saline) |
| Medicine cup capacity | 6 mL, nominal |
| Water chamber capacity | 45 mL, nominal |
| Electric protection class | II, Type BF |
| Storage temperature/humidity | 15 to 30ºC/20-80% relative humidity |
| Operating temperature/humidity | 15 to 25ºC/40-75% relative humidity |
| A-weighted sound pressure level | 75 dBA (1 m), maximum |
| Packaging Dimensions (Approximate Length × Width × Height) | |
|---|---|
| Patient Starter Kit (PSK) | 13.0" × 12.4" × 9.2" |
| Monthly Refill Kit (MRK) | 11.8" × 8.2" × 3.0" |
| Institutional Starter Kit (ISK) | 13.0" × 12.4" × 9.2" |
| TYVASO Mass and Particle Specifications for 9 breaths | |
|---|---|
| Mass Median Aerodynamic Diameter (MMAD)n=108 data points from r=3 inhalation devices. Each data point was 9 breaths. | mean = 2.0 µm SD = 0.3 |
| Total Emitted Dose per Breathn=216 data points from r=6 inhalation devices. Each data point was 1 breath. | mean = 6.0 µg SD = 0.4 |
| Total Aerosol Mass | mean = 58 µg SD = 5.9 |
| Total Respirable Dose | mean = 44.6 µg SD = 3.5 |
| Respirable Fraction | mean = 73% SD = 5 |
| Geometric Standard Deviation (GSD) | mean = 2.6 SD = 0.4 |
| Accessories | |
|---|---|
| Note: Part number subject to change. | |
| TD-300N-US | AC wall plug |
| TD-132 | Medicine cup, Quantity - 32 |
| ON-109 | Filter membranes |
| ON-120/C | Plugs |
| ON-101/C | Filter shell |
| TD-103/C | Dome assembly with baffle plate |
| ON-104/C | Inhalation piece |
| ON-105/C | Mouthpiece |
| TD-118 | Water level cup |
| TD-158 | Carrying case |
| TD-155 | Distilled water carrier |
| C: Electromagnetic compatibility (EMC) |
The TYVASO Inhalation System has been tested and found to comply with the electromagnetic compatibility (EMC) limits for medical devices according to IEC 60601-1-2: (2007). Compliance is intended to provide reasonable protection against harmful interference in a typical user environment.
Table 1, Table 2 and Table 3 document the intended EMC use environment and established compliance levels for the TYVASO Inhalation System. To ensure the intended performance, use the system in the environments described in these tables.
The TYVASO Inhalation System is intended for use in the electromagnetic environment specified in this section.
Table 1: Guidance and manufacturer's declaration - electromagnetic emissions
| Guidance and manufacturer's declaration - electromagnetic emissions | ||
| The TYVASO Inhalation System is intended for use in the electromagnetic environment specified below. The customer or the user of the TYVASO Inhalation System should assure that it is used in such an environment. | ||
| Emissions test | Compliance | Electromagnetic environment - guidance |
| RF emissions CISPR 11 | Group 1 | The TYVASO Inhalation System uses RF energy only for its internal function. Therefore, its RF emissions are very low and are not likely to cause any interference in nearby electronic equipment. |
| RF emissions CISPR 11 | Class B | The TYVASO Inhalation System is suitable for use in all establishments, including domestic establishments and those directly connected to the public low voltage power supply network that supplies buildings used for domestic purposes. |
| Harmonic emissions IEC 61000-3-2 | Class A | |
| Voltage fluctuations/flicker emissions IEC 61000-3-3 | Complies | |
Table 2: Guidance and manufacturer's declaration – electromagnetic immunity
NOTE: U T is the a.c. mains voltage prior to application of the test level. NOTE 1: At 80 MHz and 800 MHz, the higher frequency range applies. NOTE 2: These guidelines may not apply in all situations. Electromagnetic propagation is affected by absorption and reflection from structures, objects and people. | |||
| Guidance and manufacturer's declaration – electromagnetic immunity | |||
| The TYVASO Inhalation System is intended for use in the electromagnetic environment specified below. The customer or the user of the TYVASO Inhalation System should assure that it is used in such an environment. | |||
| Immunity test | IEC 60601 Test level | Compliance level | Electromagnetic environment - guidance |
Electrostatic discharge (ESD) IEC 61000-4-2 | ± 8 kV contact ± 15 kV air | ± 8 kV contact ± 15 kV air | Floors should be wood, concrete or ceramic tile. If floors are covered with synthetic material, the relative humidity should be at least 30%. |
Electrical fast transient/burst IEC 61000-4-4 | ± 2 kV for power supply lines ± 1 kV for input/output lines | ± 2 kV for power supply lines ± 1 kV for input/output lines | Mains power quality should be that of a typical commercial or hospital environment. |
Surge IEC 61000-4-5 | ± 1 kV line(s) to line(s) ± 2 kV line(s) to earth | ± 1 kV line(s) to line(s) ± 2 kV line(s) to earth | Mains power quality should be that of a typical commercial or hospital environment. |
Voltage dips, short interruptions and voltage variations on power supply input lines IEC 61000-4-11 | 0 % U T (100 % dip in U T) for 0,5 cycle 0 % U T (100 % dip in U T) for 1 cycle 70 % U T (30 % dip in U T) for 25/30 cycles 0 % U T (100 % dip in U T) for 250/300 cycle | 0 % U T (100 % dip in U T) for 0,5 cycle 0 % U T (100 % dip in U T) for 1 cycle 70 % U T (30 % dip in U T) for 25/30 cycles 0 % U T (100 % dip in U T) for 250/300 cycle | Mains power quality should be that of a typical commercial or hospital environment. If the user of the TYVASO Inhalation System requires continued operation during power mains interruptions, it is recommended that the TYVASO Inhalation System be powered from an uninterruptible power supply or the internal battery. |
Power frequency (50/60 Hz) magnetic field IEC 61000-4-8 | 30 A/m | 30 A/m | Power frequency magnetic fields should be at levels characteristic of a typical location in a typical commercial or hospital environment. |
Conducted RF IEC 61000-4-6 Radiated RF IEC 61000-4-3 | 3 Vrms 150 kHz to 80 MHz 10 V/m 80 MHz to 2.6 GHz | 3 Vrms 150 kHz to 80 MHz 10 V/m 80 MHz to 2.6 GHz | Portable and mobile RF communications equipment should be used no closer to any part of TYVASO Inhalation System, including cables, than the recommended separation distance calculated from the equation applicable to the frequency of the transmitter. Recommended separation distance d = 1.2 √P d = 1.2 √P 80 MHz to 800 MHz d = 2.3 √P 800 MHz to 2.5 GHz where P is the maximum output power rating of the transmitter in watts (W) according to the transmitter manufacturer and d is the recommended separation distance in meters (m). Field strengths from fixed RF transmitters, as determined by an electromagnetic site surveyField strengths from fixed transmitters, such as base stations for radio (cellular/cordless) telephones and land mobile radios, amateur radio, AM and FM radio broadcast and TV broadcast cannot be predicted theoretically with accuracy. To assess the electromagnetic environment due to fixed RF transmitters, an electromagnetic site survey should be considered. If the measured field strength in the location in which the TYVASO Inhalation System is used exceeds the applicable RF compliance level above, the TYVASO Inhalation System should be observed to verify normal operation. If abnormal performance is observed, additional measures may be necessary, such as re-orienting or relocating the TYVASO Inhalation System., should be less than the compliance level in each frequency rangeOver the frequency range 150 kHz to 80 MHz, field strengths should be less than [V1] V/m.. Interference may occur in the vicinity of equipment marked with the following symbol: |
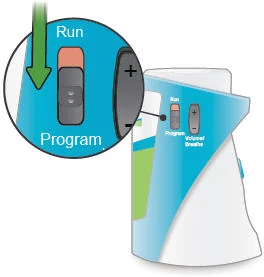
Table 3: Manufacturer's Declaration – Recommended separation distances between portable and mobile communications equipment and the TYVASO Inhalation System
For transmitters rated at a maximum output power not listed above, the recommended separation distance d in meters (m) can be estimated using the equation applicable to the frequency of the transmitter, where P is the maximum output power rating of the transmitter in watts (W) according to the transmitter manufacturer. NOTE 1: At 80 MHz and 800 MHz, the separation distance for the higher frequency range applies. NOTE 2: These guidelines may not apply in all situations. Electromagnetic propagation is affected by absorption and reflection from structures, objects and people. | |||
| Recommended separation distances between portable and mobile RF communications equipment and the TYVASO Inhalation System | |||
| The TYVASO Inhalation System is intended for use in an electromagnetic environment in which radiated RF disturbances are controlled. The customer or the user of the TYVASO Inhalation System can help prevent electromagnetic interference by maintaining a minimum distance between portable and mobile RF communications equipment (transmitters) and the TYVASO Inhalation System as recommended below, according to the maximum output power of the communications equipment. | |||
Rated maximum output power of transmitter W | Separation distance according to frequency of transmitter m | ||
150 kHz to 80 MHz d = 1.2 √P | 80 MHz to 800 MHz d = 1.2 √P | 800 MHz to 2.5 GHz d = 2.3 √P | |
| 0.01 | 0.12 | 0.12 | 0.23 |
| 0.1 | 0.38 | 0.38 | 0.73 |
| 1 | 1.2 | 1.2 | 2.3 |
| 10 | 3.8 | 3.8 | 7.3 |
| 100 | 12 | 12 | 23 |
| D: Glossary |
Accessories: Parts of the TYVASO Inhalation System. See page 29.
Ampule: A sealed, lightweight clear plastic vial containing a 1-day supply of TYVASO® (treprostinil) Inhalation Solution.
Black ring: A round seal that fits on the bottom of the dome assembly. The seal helps ensure that TYVASO does not mix with the distilled water in the device water chamber.
Display screen: A small area on the inhalation device that provides instructions and device information.
Distilled water: Water that is highly purified so that it contains only essential elements.
Dome assembly: The plastic accessory that contains the baffle plate and connects the mouthpiece, inhalation piece, and filter shells to the base of the inhalation device.
Filter membrane: The white pad that goes into the filter shells.
Filter shells: Plastic accessories that hold the filter membranes.
Inhalation indicator lights: Two green lights on the top surface of the inhalation device that signals when you should inhale.
Inhalation piece: The plastic accessory that connects the mouthpiece with the dome assembly.
Inhalation device: The base of the TYVASO Inhalation System to which the accessories connect. The inhalation device contains the display screen and lights.
Inhale: How you will breathe in TYVASO with the TYVASO Inhalation System.
Medicine cup: The disposable plastic cone-shaped cup into which TYVASO is poured. The medicine cup fits inside the water chamber.
Mouthpiece: The plastic part that you will breathe through (using your mouth) to inhale TYVASO.
On/Off, Start/Pause (blue) button: A manually activated control on the front of the device that switches between fully on and fully off power states. Once the device power is on, the button begins or pauses treatment.
Plugs: Plastic accessories that are inserted into the openings of the dome assembly between treatment sessions. Plugs help keep TYVASO from spilling if the inhalation device tips over.
Power status light: LED on the back of the device that lights green when power is connected and battery is charging.
Power port: Port on back of device for plugging into a power source using the AC wall plug.
Prompts: The audio and visual signals that help guide you through the treatment sessions.
Run / Program switch: A manually activated control on the side of the device that switches between the modes for delivering treatment (Run) and programming breaths (Program).
Sensors: The silver objects on the inside wall of the water chamber. The sensors must be covered with distilled water for the TYVASO Inhalation System to function properly.
Specialty pharmacy provider: A pharmacy that carries only specialized medicines and medical devices. Your specialty pharmacy provider is a good source of information about TYVASO and the TYVASO Inhalation System.
Treatment session: 1 of 4 daily sessions during which you will take TYVASO with a specific number of inhalations.
TYVASO: The prescription medicine that you will use with the TYVASO Inhalation System.
Volume / Breaths toggle button: A manually activated control on the side of the device that increases or decreases audio volume (when in Run mode) and programmed breaths (when in Program mode).
Water chamber: The white hollow portion in the center of the inhalation device into which distilled water and the medicine cup are placed.
| E: Warranty information |
Your TYVASO Inhalation System is granted a replacement or repair warranty good for 2 years from your date of receipt of the TYVASO Inhalation System or 5 years from the date of manufacture, whichever comes first. This warranty applies to the TYVASO Inhalation System device only. Accessory components are not covered under warranty.
| Circumstances that may void your warranty include: |
|---|
| ▶ Modification or disassembly of the TYVASO Inhalation System device by anyone other than a factory-authorized technician |
| ▶ Failure to comply with this written Instructions for Use manual when operating the TYVASO Inhalation System |
| ▶ Unapproved use of the TYVASO Inhalation System |
For all inquiries relating to service or warranty for your TYVASO Inhalation System, contact your specialty pharmacy provider.
| You should have the following information available: |
|---|
| ▶ Device serial number (located on bottom of TYVASO Inhalation System) |
| ▶ Date TYVASO Inhalation System was acquired |
| ▶ Nature of the problem and any steps taken to fix it |
TYVASO ®
INHALATION SYSTEM
TYVASO ®
(treprostinil)
INHALATION
SOLUTION
TYVASO Inhalation Solution is for prescription use only.
| Emergency contact information |
|---|
| ▶ Clinician: |
| ▶ Nurse educator: |
| ▶ Specialty pharmacist: |
| ▶ United Therapeutics: |
For further questions and information, or to report a problem with your device or an adverse event with your TYVASO Inhalation System, please call 1-844-UNITHER (1-844-864-8437).
Distributed by:
United Therapeutics Corporation
Durham, North Carolina 27713
© 2025, United Therapeutics Corporation.
All rights reserved.
102131
TYVASO is a registered trademark of
United Therapeutics Corporation.
This Instructions for Use has been
approved by the U.S. Food and Drug
Administration.
Revised: October 2025