


Patient information: uses, side effects, how to take - Onapgo
What is ONAPGO?
ONAPGO is a prescription medicine used to treat motor fluctuations (OFF episodes) in adults with advanced Parkinson's disease.
It is not known if ONAPGOis safe and effective in children.
Who should not use ONAPGO?
Do not use ONAPGO if you are:
- taking certain medicines called 5HT 3antagonists, including medicines to treat nausea (ondansetron, granisetron, dolasetron, palonosetron) and alosetron. People taking ondansetron together with apomorphine, the active ingredient in ONAPGO, have had very low blood pressure and lost consciousness (blacked out).
allergic to apomorphine or to any of the ingredients in ONAPGO including sulfite. See the end of this Patient Information leaflet for a complete list of ingredients in ONAPGO. Sulfites can cause severe, life-threatening allergic reactions in some people. An allergy to sulfites is not the same as an allergy to sulfa. People with asthma are also more likely to be allergic to sulfites.
Call your healthcare provider or get emergency help right away if you get any of the following symptoms of a severe life-threatening allergic reaction:
- hives
- itching
- rash
- swelling of the eyes, tongue, lips, or mouth
- chest pain
- throat tightness
- trouble breathing or swallowing
What should I tell my healthcare provider before using ONAPGO?
Before you start using ONAPGO, tell your healthcare provider about all of your medical conditions, including if you:
- have difficulty staying awake during the daytime.
- have dizziness.
- have fainting spells.
- have low blood pressure.
- have asthma.
- are allergic to any medicines containing sulfites.
- have heart problems.
- have had a stroke or other brain problems.
- have kidney problems.
- have liver problems.
- have a mental problem called a major psychotic disorder.
- drink alcohol.
are pregnant or plan to become pregnant. It is not known if ONAPGO will harm your unborn baby.
- are breastfeeding or plan to breastfeed. It is not known if ONAPGO passes into your breast milk. You and your healthcare provider should decide if you will take ONAPGO or breastfeed.
Tell your healthcare provider about all the medicines you take, including prescription and non-prescription (over-the-counter) medicines, vitamins, and herbal supplements.
ONAPGO and certain other medicines may affect each other and how they work. Using ONAPGO with other medicines can cause serious side effects.
- If you take nitroglycerin under your tongue (sublingual) while using ONAPGO, your blood pressure may decrease and cause dizziness. If possible, you should lie down before taking nitroglycerin under your tongue, and then try to continue lying down for at least 45 minutes after you take nitroglycerin.
Know the medicines you take. Keep a list of them to show your healthcare provider or pharmacist when you get a new medicine.
How should I use ONAPGO?
- Read the Instructions for Use for specific information about the right way to use and to throw away (dispose of) ONAPGO.
- Use ONAPGO exactly as your healthcare provider tells you to use it.
- You will be taught the right way to use ONAPGO by your healthcare provider.
- Your healthcare provider will prescribe your dose of ONAPGO, and only they may change this dose if needed.
- Your healthcare provider or a nurse provided by the drug company will program your pump.
- Your healthcare provider will prescribe ONAPGO that comes in single-dose prefilled glass cartridges, that are used with the ONAPGO pump.
- Infuse ONAPGO under your skin (subcutaneously) only. Do not inject ONAPGO into a vein.
- Keep the infusion site clean, and change the infusion site every day.
- Use a new infusion set with each infusion. Never reuse an infusion set.
- ONAPGO is a clear and almost colorless liquid. Do not use ONAPGO if it looks cloudy, discolored, or contains particles.
- Your healthcare provider may prescribe trimethobenzamide to take while you are using ONAPGO, which is an antiemetic medicine to help decrease the symptoms of nausea and vomiting that can happen with ONAPGO.
What should I avoid while using ONAPGO?
- Do notdrink alcohol while you are using ONAPGO. It can increase your chance of developing serious side effects.
- Do nottake medicines that make you sleepy while you are using ONAPGO.
- Do notdrive, operate machinery, or do other dangerous activities until you know how ONAPGO affects you.
- Do notchange your body position too fast. Get up slowly from sitting or lying. ONAPGO can lower your blood pressure and cause dizziness or fainting.
What are the possible side effects of ONAPGO?
ONAPGO may cause serious side effects, including:
- blood clots.Infusing ONAPGO into a vein (intravenous) can cause blood clots. Do notinfuse ONAPGO in your vein.
- nausea and vomiting are common side effects.Nausea and vomiting, which may be serious or severe, can happen with ONAPGO. Your healthcare provider may prescribe medicine (trimethobenzamide) to help decrease nausea and vomiting. Follow your healthcare providers instructions on how to take and when to stop this medicine.
- sleepiness or falling asleep during the day is a common side effect and may be serious.Some people treated with ONAPGO may get sleepy during the day or fall asleep without warning while doing everyday activities such as talking, eating, or driving a car.
- dizziness is a common side effect and may be serious.ONAPGO can lower your blood pressure and cause dizziness. Dizziness can happen when ONAPGO treatment is started or when the ONAPGO dose is increased. Do notget up too fast from sitting or after lying down, especially if you have been sitting or lying down for a long period of time.
- falls.The changes that can happen with PD, and the effects of some PD medicines as well as the effects of trimethobenzamide, can increase the risk of falling. ONAPGO may also increase your risk of falling.
- infusion site reaction is a common side effect that may be serious.Infusion site reactions and infections including infusion site nodules, redness, bruising, swelling, rash, and itching may happen during treatment with ONAPGO.
- hallucinations or psychotic-like behavior.ONAPGO can cause or worsen psychotic-like behavior including hallucinations (seeing or hearing things that are not real), confusion, excessive suspicion, aggressive behavior, agitation, delusional beliefs (believing things that are not real), and disorganized thinking.
- sudden uncontrolled movements (dyskinesia) are a common side effect and may be serious.Some people with PD may get sudden, uncontrolled movements after treatment with some PD medicines. ONAPGO can cause or make dyskinesia worse.
- low red blood cells (hemolytic anemia).Tell your healthcare provider if you have any of the following signs or symptoms: you become pale, fast heartbeat, feel more tired or weaker than usual, skin or eyes look yellow, chest pain, shortness of breath or trouble breathing, dark-colored urine, fever, dizziness, or confusion.
- strong (intense) urges.Some people with PD have reported new or increased gambling urges, increased sexual urges, and other intense urges, while taking PD medicines, including ONAPGO.
- heart problems.If you have shortness of breath, fast heartbeat, or chest pain while taking ONAPGO, call your healthcare provider or get emergency help right away.
- serious heart rhythm changes (QT prolongation).Tell your healthcare provider right away if you have a change in your heartbeat (a fast or irregular heartbeat), or if you faint.
- allergic reaction.An allergic reaction can happen when using ONAPGO. Tell your healthcare provider or get medical help right away if you get any of these symptoms: hives, itching, rash, swelling of the eyes and tongue, or trouble breathing.
- tissue changes (fibrotic complications).Some people have had changes in the tissues of their pelvis, lungs, and heart valves when taking medicines called non-ergot derived dopamine agonists like ONAPGO.
- prolonged painful erections (priapism). ONAPGO may cause prolonged, painful erections in some people. If you have an erection that lasts more than 4 hours you should call your healthcare provider or go to the nearest hospital emergency room right away.
Other common side effects of ONAPGO include:
- headache
- trouble falling asleep or staying sleep (insomnia)
Tell your healthcare provider if you have any side effect that bothers you or that does not go away.
These are not all the possible side effects of ONAPGO. For more information, ask your healthcare provider or pharmacist.
Call your doctor for medical advice about side effects. You may report side effects to FDA at 1-800-FDA-1088.
How should I store ONAPGO?
- Store ONAPGO at room temperature between 68°F to 77°F (20°C to 25°C).
Keep ONAPGO and all medicines out of the reach of children.
General information about the safe and effective use of ONAPGO.
Medicines are sometimes prescribed for purposes other than those listed in a Patient Information leaflet. Do not use ONAPGO for a condition for which it was not prescribed. Do not give ONAPGO to other people, even if they have the same symptoms that you have. It may harm them.
You can ask your healthcare provider or pharmacist for information about ONAPGO that is written for health professionals.
What are the ingredients in ONAPGO?
Active ingredient:apomorphine hydrochloride
Inactive ingredients:hydrochloric acid, sodium metabisulfite in water for injection.
Manufactured for: MDD US Operations, LLC, 9715 Key West Ave., Rockville, MD 20850.
MDD US Operations, LLC is a subsidiary of Supernus Pharmaceuticals, Inc.
MDD US Operations, LLC is the exclusive licensee and distributor of ONAPGO in the United States and Its territories.
ONAPGO is a trademark of BRITUSWIP LTD.
©2025 MDD US Operations, LLC, a subsidiary of Supernus Pharmaceuticals, Inc.
For more information, go to ONAPGO.comor call 1-833-366-2746
RA-ONG-PPI-V1
Patient
INSTRUCTIONS FOR USE
ONAPGO™ (on-AP-goh)
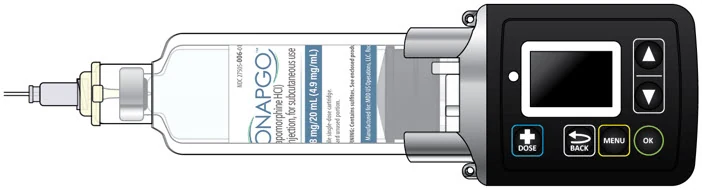
This Instructions for Use contains information on how to use the ONAPGO Infusion System.
Please see the Important Safety Informationsection below, the Full Prescribing Information, and the Patient Information for ONAPGO.
MDD US Operations, LLC
Table of Contents
| Table of Contents | 3 |
| ONAPGO Infusion System | 5 |
| Indication for Use | 5 |
| Introduction to the Infusion System | 5 |
| Important Information | 6 |
| Pump Warnings and Precautions | 6 |
| Pump Kit | 9 |
| Pump Diagram | 9 |
| Pump Screen Icons | 11 |
| Other Supplies Provided Separately | 12 |
| Storage | 13 |
| Glass Drug Cartridge Storage | 13 |
| Pump Storage | 13 |
| Important Information You Need to Know Before Infusing ONAPGO | 13 |
| Important Safety Information | 13 |
| Check the Pump Settings | 14 |
| Step 1: Check the Pump Settings | 14 |
| Setup | |
| Set Up the Pump | 23 |
| Step 2: Wash Your Hands and Gather Supplies | 23 |
| Step 3: Assemble the Plastic Cartridge Holder | 25 |
| Step 4: Prime the Infusion Line | 33 |
| Prepare the Infusion Site | 38 |
| Step 5: Select and Clean the Infusion Site | 38 |
| Step 6: Connect the Cannula to the Body | 39 |
| Connect the Infusion Line to Body | 40 |
| Step 7: Connect the Infusion Line to the Cannula | 40 |
| Start the Infusion | 41 |
| Step 8: Start the Infusion | 41 |
| Wear the Pump | 43 |
| Step 9: Wear the Pump | 43 |
| Reading the Pump Screen | 45 |
| ON (Infusing Screen) | 45 |
| Paused | 46 |
| Primed | 46 |
| Off | 46 |
| Extra Dose / Pause / End | |
| Give a + Dose (Extra Dose) | 51 |
| Step 10: Give an Extra Dose | 51 |
| Another Way of Giving an Extra Dose | 53 |
| Understanding the Extra Dose Features | 54 |
| Pause and Resume the Infusion | 55 |
| Step 11: Pausing the Infusion | 55 |
| Step 12: Resuming the Infusion | 57 |
| Ending the Infusion | 59 |
| Step 13: Ending the Infusion Early | 59 |
| Step 14: Ending the Infusion Regularly | 64 |
| Disconnecting in an Emergency | 68 |
| Step 15: Disconnecting in an Emergency | 68 |
| Pump Care | |
| Disposal | 73 |
| Glass Drug Cartridge, Plastic Cartridge Holder, and Infusion Line Disposal | 73 |
| Pump Disposal | 73 |
| Cleaning and Disinfecting the Pump | 74 |
| Step 16: Clean and Disinfect the Pump | 75 |
| Maintenance and Repair | 75 |
| Replacing the Battery | 81 |
| Step 17: Replacing the Battery | 81 |
| Alarms & Errors | |
| Alarms and Troubleshooting | 91 |
| Error Codes | 91 |
| Troubleshooting: If Your Infusion Line Did Not Prime | 98 |
| Symbols Used on the ONAPGO Pump | 99 |
| Technical Characteristics of the Pump | 100 |
| Electromagnetic Compatibility | 102 |
| Tests of Accuracy | 104 |
| Limited Warranty | 105 |
| Contact & Support | 105 |
ONAPGO Infusion System
| Indication for Use |
The ONAPGO Infusion Pump is for the subcutaneous infusion of ONAPGO (apomorphine hydrochloride). ONAPGO is a prescription medicine used to treat motor fluctuations in adults with advanced Parkinson's disease (PD).
Only use the ONAPGO Infusion Pump if you have received instruction and training on how to correctly and safely use it. If you cannot use ONAPGO by yourself, contact your healthcare provider.
Only the accessories supplied by CANÈ S.p.A. (plastic cartridge holder and supplies provided in the infusion pump kit) may be used in conjunction with this pump. The pump must be set (programmed) by a trained healthcare provider or a trained nurse provided by the company (clinical nurse navigator).
| Introduction to the Infusion System |
Below are common terms used throughout this Instructions for Use.
- Pump:controls the rate and amount of ONAPGO delivered to the body. It is programmed by a healthcare provider based on the patient's prescription. The pump displays the status of medicine delivery.
- Priming:refers to the task of removing all air from the infusion line (fluid pathway) before the infusion line is connected to the body.
- Flow Rate:the constant flow of ONAPGO given to the body over an extended period of time. The flow rate is expressed as milligrams per hour (mg/hr).
- Infusion Time:the total time that ONAPGO is infused per day.
Extra Dose (+ Dose):a boost of ONAPGO (bolus dose) given over a short period of time in addition to the prescribed flow rate. Your healthcare provider will decide the number of extra doses that you could have each day. Your healthcare provider might prescribe an extra dose to be used as follows:
- when you start the infusion each day, which can help the medicine work faster.
- when you restart your medicine after not having it for 1 hour or more.
- if you have an OFF episode during an infusion.
- Extra Dose (+ Dose) Lock:the amount of time before another extra dose can be given.
- Pump Settings:the patient's prescribed Flow Rate, Maximum Infusing Time Per Day, + Dose Quantity, + Dose Volume, and + Dose Lock. These settings can only be changed by a healthcare provider or clinical nurse navigator.
| Important Information |
Read this entire Instructions for Use before using the infusion system.
If any of the information is not clear, or if you have any questions, please contact Customer Support at 1-833-3ONAPGO (1-833-366-2746).
- Understanding how to use the pump and the potential alarms will help you avoid harm.
- You may hear motor noise when the pump is On and delivering ONAPGO. This noise is normal and means the pump is working correctly.
- The pump screen falls asleep (goes dark) after 30 seconds of inactivity. Press the UP ARROW button (
 ) to wake up the screen.
| Pump Warnings and Precautions |
Failure to follow the warnings and precautions below could cause return of your symptoms, damage to the pump, serious injury, or may lead to death in rare cases.
 WARNINGS:
Always check that the pump settings match the prescription before starting an infusion.
See the Check Pump Settings section on pages 14 to 18 for how to check the pump settings to make sure they are correct. If any of these settings do not match the prescription, contact your healthcare provider and/or clinical nurse navigator.
- The patient should receive no more than 98 mg of ONAPGO every 24 hours. This corresponds to one complete cartridge per day. Only use the pump with ONAPGO (apomorphine hydrochloride). ONAPGO comes in a glass cartridge that contains 98 mg/20 mL (4.9 mg/mL) of medicine. Only use the pump system within the temperatures on page 13 and other conditions for use in this Instructions for Use. Using the medicine and pump outside of these conditions may result in a system alarm.
- Only use the pump with the supplied plastic cartridge holder. Any other cartridge holder could damage the pump and cause harm. Any non- approved cartridge holder voids warranty. MDD US Operations, LLC or its manufacturer is not responsible for any damages or injuries that happen if a different cartridge holder is used.
- Use the infusion set that is provided by your specialty pharmacy. The use of an inappropriate infusion set can cause loss or leakage of drug. Use a new infusion set at the beginning of every infusion. Ask your healthcare provider and/or clinical nurse navigator for more information.
- Do notprime the infusion line when it is connected to the body.
- Do notinsert the cannula into a blood vessel.
- If the medicine is cloudy, green, or contains particles, throw the glass drug cartridge in a sharps disposal container. (See the Disposalsection on page 73 for information on how to safely throw away ONAPGO). Get a new cartridge for your infusion.
- Clean the top of the glass drug cartridge with a new alcohol wipe before attaching the plastic cartridge holder.
- Always clean the selected infusion site with a new alcohol wipe. Make sure the site is dry before going on to the next step.
- Before starting your infusion, check for any leaks. Do notuse the pump if there are leaks. Contact Customer Support at 1-833-3ONAPGO (1-833-366-2746).
- Be careful when handling the infusion set to prevent needle sticks.
- Supplies included with your pump could pose a choking hazard for small children. Make sure that the pump and all supplies are kept away from small children.
- Supplies included with your pump (such as the infusion line) could pose a strangulation hazard. Arrange the infusion line to minimize the risk of strangulation. Make sure that these parts are stored in a secure place when not in use.
- Throw away (discard) the battery if it becomes damaged. Use a new, unopened battery. See Replacing the Battery section on pages 81 to 85 (Steps 17.1 through 17.9) for instructions on how to replace the battery.
- The pump can detect a blockage in the line. If a partial blockage occurs, the pump will work the way it should until the line has a full blockage. An alarm will sound if the line has a full blockage.
- Be sure to disconnect the infusion line from the body before clearing a blockage alarm. If a blockage alarm is cleared while the infusion line is still attached, you may receive a small amount of additional medicine. See the Alarms and Troubleshooting section on page 91.
- Confirm that the plastic cartridge holder and infusion line packaging are sealed and have not been damaged. If the packaging looks damaged, throw it away in a sharps disposal container, and do not use it for your infusion. See the Disposal section on page 73 for information on how to safely throw away ONAPGO. Use a new, undamaged product.
- If the battery becomes hot, do not continue with your infusion and call Customer Support at 1-833-3ONAPGO (1-833-366-2746).
- If your glass drug cartridge breaks while assembled in the plastic cartridge holder, do not separate it from the plastic cartridge holder. Disconnect the assembled cartridge from the pump and throw both away in a sharps disposal container. See the Disposal section on page 73 for information on how to safely throw away ONAPGO.
- Do notsnag or kink the infusion line while wearing the pump. Snagging or kinking the infusion line can cause a blockage (occlusion) or an interruption to the infusion.
- Always check the expiration date on the infusion set, plastic cartridge holder and glass drug cartridge prior to use. Do notuse expired materials.
- Do notuse expired or rechargeable batteries with the pump.
- If the glass drug cartridge is dropped, it should not be used and should be thrown away in a sharps disposal container.
- If the pump gets wet, pause the infusion, disconnect the infusion line from the body, and store the pump in a dry place. This includes when swimming, showering, or excessively sweating.
- If your ONAPGO pump has expired, do not use it. Call your healthcare provider and/or clinical nurse navigator for a replacement of your ONAPGO pump.
PRECAUTIONS:
- Do notuse sharp objects to press the pump buttons. Only use your fingertips to press the pump buttons.
- Do notuse a damaged pump. If you have any concern about the correct functioning of the pump, or how to respond to an error, contact Customer Support at 1-833-3ONAPGO (1-833-366-2746).
- Read the infusion set Instructions for Use before using the infusion line.
- All pump settings, including sounds, are locked for your safety.
- Do notattempt to change the pump's prescribed settings. These can only be changed by a healthcare provider and/or clinical nurse navigator.
- Do notdisconnect the infusion line from the plastic cartridge holder while the pump is infusing.
- Only clean the infusion site with an alcohol wipe. Do not clean the infusion site with or apply disinfectants, perfumes, deodorants, or lotions to it.
- Free-flow is if gravity causes the drug to come out of the cartridge. The pump's pusher is made to have a secure connection with the rubber plunger in the cartridge to prevent free flow of the drug.
| Pump Kit (Figure A) |
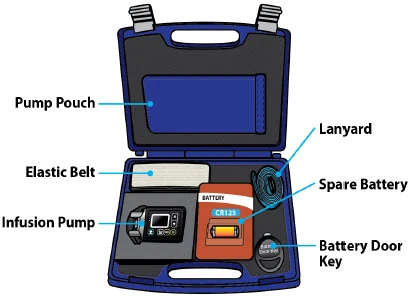
| Pump Diagram (Figures B, C, and D) |
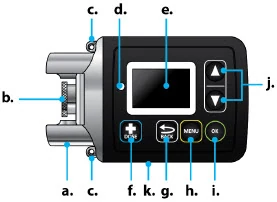 |
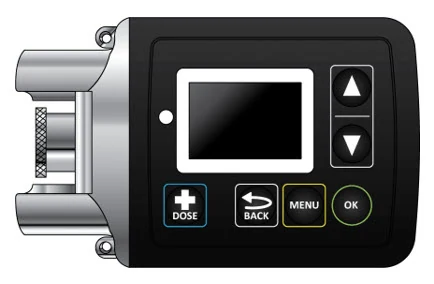
All buttons will respond with a single press. If the screen is dark, press the UP ARROW button ( ) to wake up the screen.
| Item | Pump Feature | Description |
|---|---|---|
| a | Cartridge Connection | Area where assembled glass drug cartridge and plastic cartridge holder are attached to the pump. |
| b | Pump Pusher | Pushes ONAPGO from the glass drug cartridge into the infusion line. |
| c | Neck Lanyard Clips | Slots to clip on the lanyard. |
| d | LED | Lights up when an error cannot be displayed on the screen. |
| e | Screen | Where messages and menus appear. |
| f |  | +DOSE button gives an extra dose (+ dose) (if prescribed). |
| g |  | BACK button allows you to return to a previous screen, menu, or cancel an action. |
| h |  | MENU button allows you to access the menus. |
| i |  | OK button allows you to confirm menu selections or go on to the next value. |
| j |  | UP and DOWN ARROW buttons allow you to scroll through menus. |
| k | Battery Door | Door to access the battery. |
| Pump Screen Icons |
The following table shows icons that appear on the pump screen.
| Icon | Name | Description | |
|---|---|---|---|
 | Back Arrow | The back arrow is shown when checking the pump settings. This icon is used to show that pressing the BACK button will return to a previous screen (Item 'g' in Figure B). | |
 | Caution | Caution is shown when an error or alarm is occurring. | |
 | Check Mark | A check mark is shown when the pump successfully completes a task. | |
 | Droplet | A blinking droplet is shown on the Infusing Screen when an infusion is on. | |
 | Dead Battery | The dead battery is shown when the pump battery is dead and must be replaced. | |
 | Low Battery | The Low Battery is shown when the pump battery is low and should be replaced before the next infusion. | |
 | OK Arrow | The OK Arrow is shown when checking the pump settings. This icon is used to show that pressing the OK button will confirm a selection or go on to the next value (Item 'i' in Figure B). | |
 | Padlock | Padlock is shown when the +Dose (extra dose) is not available. | |
 | Pause | Pause is shown when the infusion is paused. | |
 | +Dose (Extra Dose) | A +refers to the +Dose (extra dose) function. | |
| Other Supplies Provided Separately |
Additional supplies not in the pump kit include (Figure E):
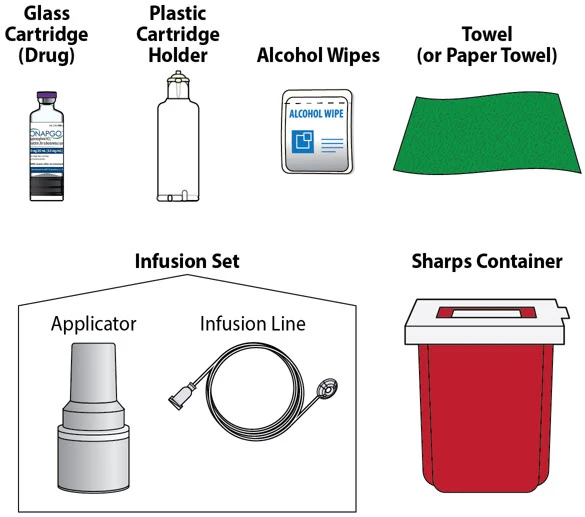 |
| Note:The plastic cartridge holder, glass drug cartridge and infusion set parts are sterile. |
| Figure E |
Storage
| Glass Drug Cartridge Storage |
Store the glass drug cartridges at room temperature between 68°F to 77°F (20°C to 25°C). Store in the original container.
| Pump Storage |
If the pump will not be used for 1 month or more, remove the battery. See Replacing the Battery section on pages 81 to 85 (Steps 17.1 through 17.9) for instructions on how to remove the battery.
Store the pump in a dry place between -13°F to 158°F (-25°C to 70°C).
Keep the pump away from:
- Children and pets.
- Sources of heat or cold such as radiators, burners, stoves, freezers, or other heat or cold sources. Ask your healthcare provider or clinical nurse navigator if you are not sure.
- Direct sunlight.
- Strong electromagnetic fields such as magnets, speakers, and mobile devices.
- Ionizing radiation, a type of device for radiotherapy or diagnostic radiology.
- Ultrasound devices.
- Magnetic Resonance Imaging (MRI) devices. The pump should not be used with an MRI.
If you are not sure about what to keep your pump away from, please contact your Customer Support at 1-833-3ONAPGO (1-833-366-2746).
Important Information You Need to Know Before Infusing ONAPGO
| Important Safety Information |
This Instructions for Use is for patients, caregivers, and healthcare providers or clinical nurse navigators and describes how to use the infusion system.
- The Instructions for Use are important for the safe and correct use of this infusion system.
- Read the entire Instructions for Use before using the infusion system.
Check the Pump Settings
| Step 1: Check the Pump Settings |
Confirm your pump settings match your prescription by doing the following steps.
| Do notstart an infusion if any of the pump settings do not match your prescription. If this happens, contact your healthcare provider or clinical nurse navigator. |
Step 1.1 Look at the pump. If the pump screen is dark, press the UP ARROW button ( | 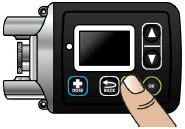 Figure F |
| You will then see the Infusion Off screen (Figure G). | 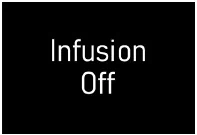 Figure G |
Step 1.2 Press the MENU button ( | 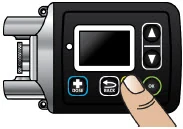 Figure H |
Step 1.3 Highlight Settings on the screen using the DOWN ARROW button ( | 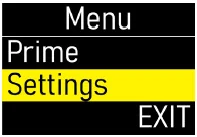 Figure I |
Press the OK button (  ) to begin reviewing the pump settings (Figure J). |  Figure J |
Step 1.4 Make sure the flow rate (mg/hr) matches your prescription (Figure K). | 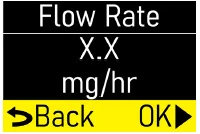 Figure K |
| Press the OK button ( ) to move to the next screen (Figure L). | Figure L |
Step 1.5 Make sure the infusion time (hr) matches your prescription (Figure M). | 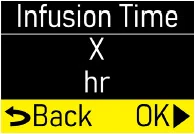 Figure M |
| Press the OK button ( ) to move to the next screen (Figure N). | Figure N |
Step 1.6 Make sure the number of +Doses/ Day (extra doses/day) matches your prescription (Figure O). | 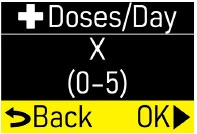 Figure O |
| Press the OK button ( ) to move to the next screen (Figure P). | Figure P |
Step 1.7 Make sure the +Dose (extra dose) amount (mg) matches your prescription (Figure Q). | 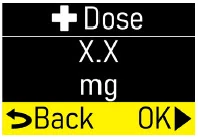 Figure Q |
| Press the OK button ( ) to move to the next screen (Figure R). | Figure R |
Step 1.8 Make sure +Dose Lock (extra dose lock) time (hr, min) matches your prescription (Figure S). | 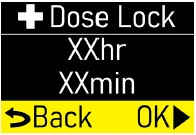 Figure S |
| Press the OK button ( ) to move to the next screen (Figure T). | Figure T |
Step 1.9 You will see the software version (Figure U). | 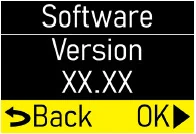 Figure U |
| Press the OK button ( ) to move to the next screen (Figure V). | Figure V |
Step 1.10 Exitwill be highlighted on the Menu screen (Figure W). | 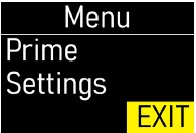 Figure W |
| Press the OK button ( ) to exit the menu (Figure X). | Figure X |
| You will then see the Infusion Off screen (Figure Y). Set the pump aside on a clean surface and continue to the Set up the Pump section. | 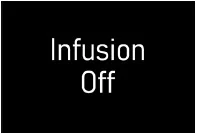 Figure Y |
 ) to find the pump settings (Figure H).
| Setup | |
| Within this section you will find: | |
| Set up the Pump | 23 |
| Prepare the Infusion Site | 38 |
| Connect the Infusion Line to Body | 40 |
| Start the Infusion | 41 |
| Wear the Pump | 43 |
| Reading the Pump Screen | 45 |
Set Up the Pump
| Step 2: Wash Your Hands and Gather Supplies |
Step 2.1 Go to a sink and wash your hands with soap and water, then dry your hands (Figure Z). | 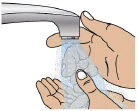 Figure Z |
Step 2.2 Prepare a clean, flat surface such as a table to work on (Figure AA). |  Figure AA |
Step 2.3
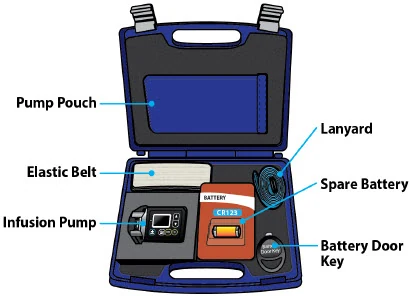
Take the blue case and open it (Figure AB). Gather the additional supplies not included in the case (Figure AC).
Infusion System Kit Supplies Included in the Case (Figure AB):
- Pump Pouch
- Elastic Belt
- Pump
- Lanyard
- Spare Battery
- Battery Door Key
Additional Supplies Not Included in the Case (Figure AC):
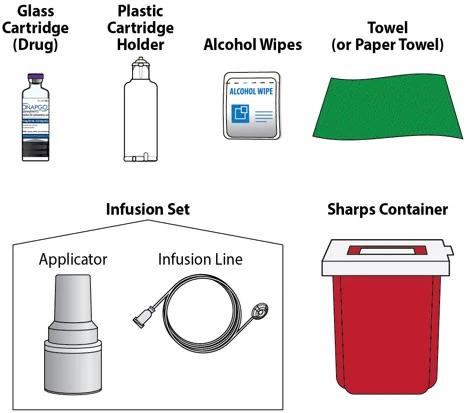
- Glass Drug Cartridge (Sterile)
- Plastic Cartridge Holder (Sterile)
- Infusion Set Parts (Sterile)
- Alcohol Wipes
- Towel (or Paper Towels)
- Sharps Disposal Container. See the Disposal Section on page 73 for information on how to safely throw away ONAPGO.
| Do notuse other drug cartridges with the pump. The pump must only be used with an ONAPGO glass drug cartridge containing apomorphine hydrochloride 98 mg/20 mL (4.9 mg/mL). |
| Do notuse other cartridge holders with the pump. The pump must only be used with the plastic cartridge holder that is provided. |
| Step 3: Assemble the Plastic Cartridge Holder |
Step 3.1 Prepare the Plastic Cartridge Holder Look at the plastic cartridge holder package. Make sure the expiration date (EXP) has not passed (Figures AD and AE). | 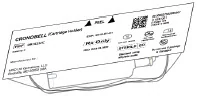 Figure AD |
If the expiration date has passed: Throw the plastic cartridge holder away in a sharps disposal container and get a new plastic cartridge holder. See the Disposal section on page 73 for information on how to safely throw away ONAPGO. | 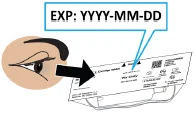 Figure AE |
| Remove the plastic cartridge holder from its package (Figure AF). | 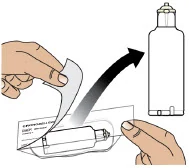 Figure AF |
Step 3.2 Prepare the Infusion Line Look at the infusion line package. Make sure the expiration date has not passed (Figure AG). If the expiration date has passed: Throw the infusion line away in a sharps disposal container and get a new infusion line. See the Disposal section on page 73 for information on how to safely throw away ONAPGO. | 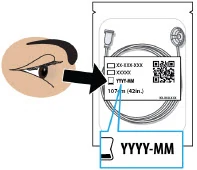 Figure AG |
Remove the infusion line from its package and tear off the paper tab. Unravel the infusion line so it is straight (Figure AH). | 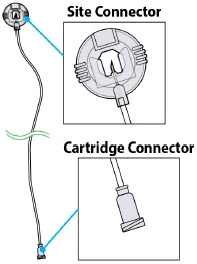 Figure AH |
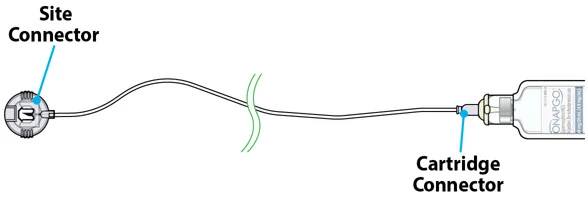
Step 3.3 Connect the Infusion Line and the Plastic Cartridge Holder Find the cartridge connector end of the infusion line (Figure AI). | 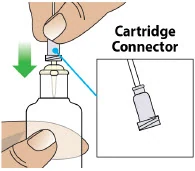 Figure AI |
Place the cartridge connector end of the infusion line over the tip of the plastic cartridge holder and turn the cartridge connector until it is snug (Figures AJ and AK). Note:It only takes a small movement to secure the parts together. Do not connect the infusion line to the body at this time.You must prime the infusion line before connecting it to your body. | 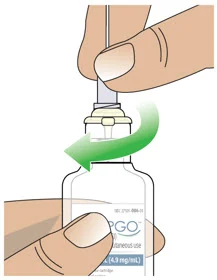 Figure AJ |
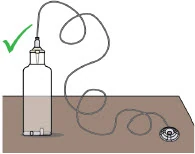 Figure AK | |
Step 3.4 Prepare the Glass Drug Cartridge Remove the glass drug cartridge from its carton and look at the label. Make sure the expiration date has not passed on the glass drug cartridge (Figures AL and AM). | 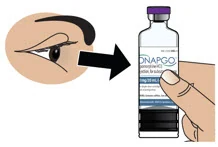 Figure AL |
If the expiration date has passed: Throw the glass drug cartridge away in a sharps disposal container and get a new glass drug cartridge. See the Disposal section on page 73 for information on how to safely throw away ONAPGO. | 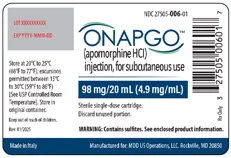 Figure AM |
Step 3.5 Check the Medicine Look at the glass drug cartridge. Make sure the liquid medicine inside the glass drug cartridge is clear, almost colorless, and free from particles (Figure AN). | 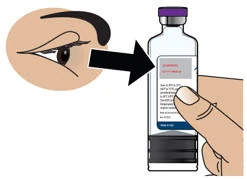 Figure AN |
Important Information
| If the medicine is cloudy, discolored, or contains particles,throw away the glass drug cartridge in a sharps disposal container and get a new one. See the Disposal section on page 73 for information on how to safely throw away ONAPGO. |
Step 3.6 Remove the Flip Cap from the Glass Drug Cartridge Hold the glass drug cartridge and remove the flip cap (Figure AO). You may need to push hard to remove the flip cap. You can throw the flip cap away in your household trash. | 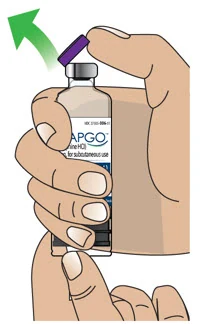 Figure AO |
Step 3.7 Clean the Glass Drug Cartridge Clean the top of the glass drug cartridge with a new alcohol wipe (Figure AP). | 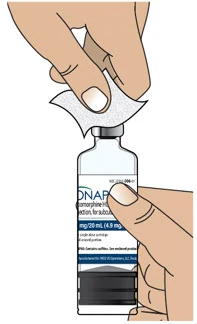 Figure AP |
Step 3.8 Place the Glass Drug Cartridge Place the glass drug cartridge on a flat surface on top of a towel or paper towel (Figure AQ). | 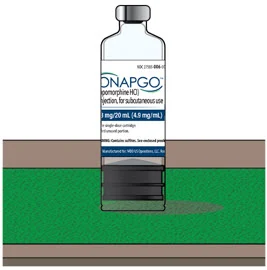 Figure AQ |
Step 3.9 Attach the Plastic Cartridge Holder to the Glass Drug Cartridge Take the plastic cartridge holder. Place the plastic cartridge holder, with the infusion line attached, over the glass drug cartridge and push all the way down (Figures AR and AS). | 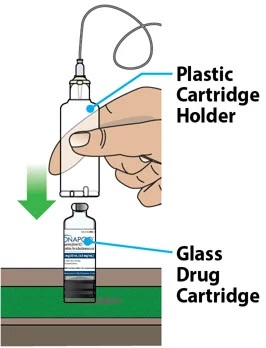 Figure AR |
Note:After letting go, the plastic cartridge holder may come up a bit so that it is not even with the bottom of the glass drug cartridge. This is normal. A small amount of liquid medicine might come out of the glass drug cartridge. This is normal. You have now created an "assembled cartridge" (Figure AT). Note:Change the cartridge, cartridge holder, and administration set daily or between uses. Note:If the infusion line is dropped or dirty, throw away (discard) the infusion line. Warning:Do not puncture the cartridge with anything but the specified plastic cartridge holder. | 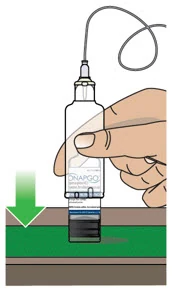 Figure AS |
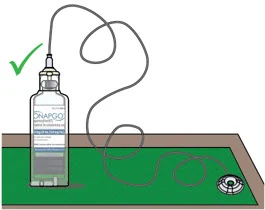 Figure AT | |
Step 3.10 Place the Assembled Cartridge on the Pump Hold the pump upright as shown (Figure AU). Note:There are ridges at the bottom of the plastic cartridge holder. You will use these ridges in the next step to align the assembled cartridge with the pump. | 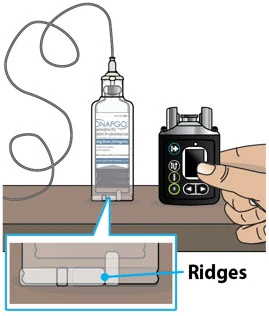 Figure AU |
| Take the assembled cartridge. Position the assembled cartridge above the pump with the ridges facing you (Figure AV). | 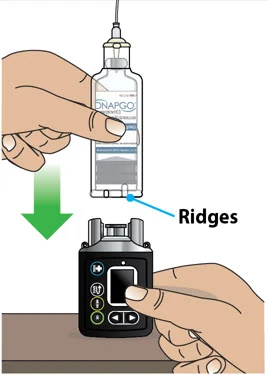 Figure AV |
| Place the assembled cartridge onto the pump, as shown, with the ridges showing in the pump opening (Figure AW). The assembled cartridge should sit flush against the pump with no gap. | 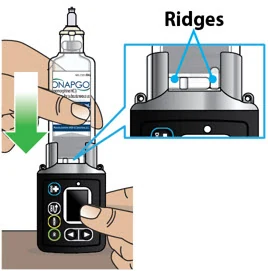 Figure AW |
Step 3.11 Attach the Assembled Cartridge to the Pump Push downthe assembled cartridge firmly and twistuntil you feel it lock into place and the ridges are no longer showing (Figure AX). | 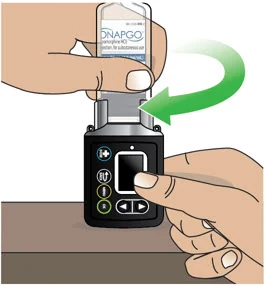 Figure AX |
Look at the Pump opening.
|
|
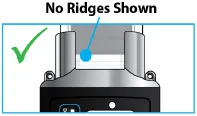 Figure AY
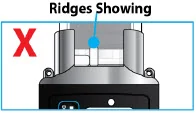 Figure AZ
| Step 4: Prime the Infusion Line |
Priming the infusion line (Figure BA) pushes liquid through the system to remove all air from the glass drug cartridge and infusion line. All air must be removed from the system before the infusion line is connected to the infusion site on the body.
| Read the Instructions for Use for the infusion set before using the infusion line. |
| Do notprime the infusion line when it is connected to the infusion site on the body. |
Step 4.1 Take the site connector end of the infusion line and place it on a towel (Figure BB). |  Figure BB |
Step 4.2 Take the pump. Press the UP ARROW button ( | 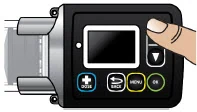 Figure BC |
| You will then see the Infusion Off screen (Figure BD). | 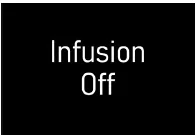 Figure BD |
Step 4.3 Press the MENU button ( | 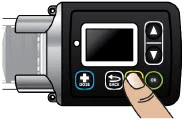 Figure BE |
Step 4.4 The Primeoption will be highlighted on the Menu screen (Figure BF). | 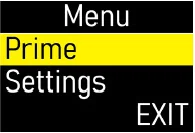 Figure BF |
| Press the OK button ( ) to continue (Figure BG). | Figure BG |
Step 4.5 You will see the Ready to Prime screen (Figure BH). |  Figure BH |
Press the OK button ( Note:Make sure that the site connector is held over the towel and not attached to the body. During priming, you will be looking for drops to come out of the site connector. | Figure BI |
| You will then see the Priming screen flashing (Figure BJ). This means that the pump is priming. |  Figure BJ |
During Priming… Check the connector end of the infusion line for drops of liquid medicine (Figure BK). | 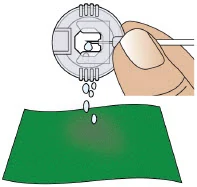 Figure BK |
Important Information
| Do notallow the medicine to come into contact with your clothing, carpeting, or furniture, as it can stain. |
Step 4.6 When priming is done you will see this screen (Figure BL). |  Figure BL |
After priming… Check that all air gaps or large air bubbles are removed from the line (Figure BM). | 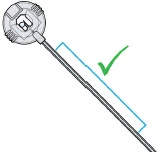 Figure BM |
| Press the OK button ( ) for menu options (Figure BN). | Figure BN |
Step 4.7 Did you see drops and confirm that there are no large air bubbles or gaps in the line?
|
|
Step 4.8 You will see a screen that says Wait! Connect Line to Body (Figure BQ). |  Figure BQ |
| Put down the pump(Figure BR) and follow the next sections to "Prepare the Infusion Site" and "Connect the Infusion Line to Body". | 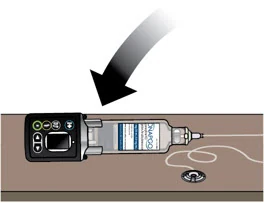 Figure BR |
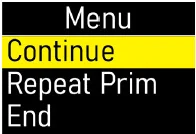 Figure BO
Prepare the Infusion Site
You will insert the cannula (a small tube that allows the medicine to be delivered) into the selected infusion site.
| Step 5: Select and Clean the Infusion Site | |
Step 5.1 Select one of the following infusion sites (see blue shaded areas in Figure BS):
| 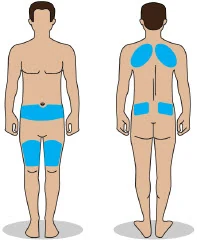 Figure BS |
Important Information
| Change the infusion site every day (rotate sites) to avoid skin-related problems, such as bumps or nodules. |
| Do notselect an infusion site that is bruised, has bumps or nodules, or is irritated. |
| Do notselect an infusion site other than those listed and shown in Figure BS. |
Step 5.2 Get an alcohol wipe. Clean the selected infusion site with a new alcohol wipe (Figure BT). Make sure the area is dry before moving on to Step 6. | 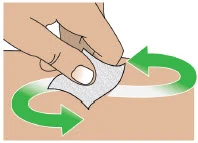 Figure BT |
Note:If the infusion line is dropped or dirty, throw away (discard) the infusion line.
| Step 6: Connect the Cannula to the Body | |
Step 6.1 Following the infusion set Instructions for Use, insert the cannula into the cleaned infusion site (Figure BU). | 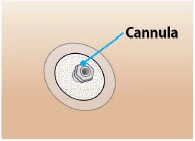 Figure BU |
| Read the Instructions for Use for the infusion set before using the infusion line. |
| Do notinsert the cannula into a blood vessel. |
| Do notinsert the cannula into a bump or nodule, as it can result in a blockage (occlusion). |
Connect the Infusion Line to Body
| Step 7: Connect the Infusion Line to the Cannula | |
Step 7.1 Take the site connector end of the infusion line. Pinch the sides of it and pull on the end of the site connector to open it (Figure BV). | 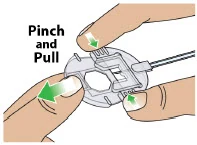 Figure BV |
Step 7.2 Connect the primed infusion line to the cannula on the body by placing the site connector over the cannula and then closing it (Figures BW and BX). For more information, follow the Instructions for Use provided with the infusion set. |
|
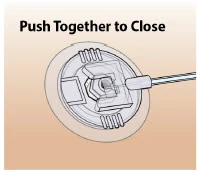 Figure BX
Start the Infusion
| Step 8: Start the Infusion |
Step 8.1 Pick up the pump. Press the UP ARROW button ( | 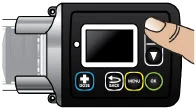 Figure BY |
| You will see a screen that says Connect Line to Body (Figure BZ). |  Figure BZ |
| Now that you have connected the line to your body, press the OK button ( ) (Figure CA). | Figure CA |
| You will see a screen that says Confirm Line Connected (Figure CB). | 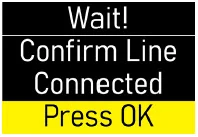 Figure CB |
Make sure that the site connector is attached to the body. Then press the OK button ( | Figure CC |
Step 8.2 You will see a screen that says Start Infusion (Figure CD). |  Figure CD |
| When ready, press the OK button ( ) to start the infusion (Figure CE). | Figure CE |
| You will then see the Infusion Started screen. The checkmark at the bottom of the screen means that the infusion has successfully started (Figure CF). | 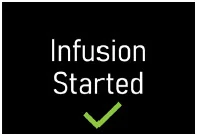 Figure CF |
| After the infusion has started, you will see the Infusing Screen. The flashing droplet means that the pump is now infusing (Figure CG). Next to the droplet, you will also see the amount of time before the infusion ends. | 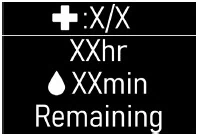 Figure CG |
Wear the Pump
| Step 9: Wear the Pump | |
You must place the pump inside the pump pouch and then attach it to either the elastic belt or the lanyard, whichever you prefer. Using the Elastic Belt | |
| Take the elastic belt and pump pouch. Insert the elastic belt into the loop on the back of the pump pouch (Figure CH). | 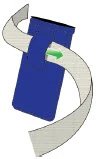 Figure CH |
| Take the pump. Place the pump inside of the pump pouch (Figure CI). | 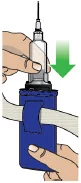 Figure CI |
| Secure the elastic belt around the waist (Figure CJ). | 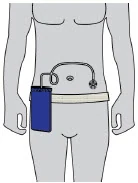 Figure CJ |
| Do notsnag or kink the infusion line while wearing the pump. Snagging or kinking the infusion line can cause a blockage (occlusion) or an interruption to the infusion. |
Using the Neck Lanyard
| Take the neck lanyard and pump. Hook the lanyard to the neck lanyard clips (Figure CK) located on the pump. |  Figure CK |
| Take the pump pouch. Place the pump inside of the pump pouch (Figure CL). | 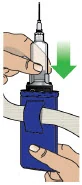 Figure CL |
| Place the lanyard around the patient's neck (Figure CM). | 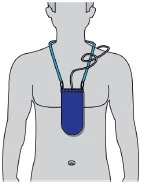 Figure CM |
| Do notsnag or kink the infusion line while wearing the pump. Snagging or kinking the infusion line can cause a blockage (occlusion) or an interruption to the infusion. |
Reading the Pump Screen
There are 4 main modes for the pump: On (Infusing Screen), Paused, Primed, and Infusion Off. Each mode is described below.
| ON (Infusing Screen) |
| When the pump is On, and the infusion is running, the following icons and information will be seen (Figure CN): |
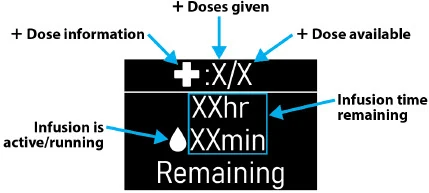 Figure CN |
| When the pump is On and you attempt to give an extra dose ( +Dose), the following icon will be seen when the extra dose ( +Dose) is locked out (Figure CO): |
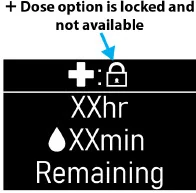 Figure CO |
| Paused |
| When the infusion is paused, the following screen will be seen (Figure CP): |
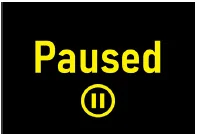 Figure CP |
| To pause the infusion, see the Pausing the Infusioninstructions on page 55. |
| Primed |
| When the pump is primed, but the infusion has not started, the following screen will be seen (Figure CQ): |
 Figure CQ |
| OFF |
| When the pump is not infusing, the following screen will be seen (Figure CR): |
| Figure CR |
| + Dose / Pause / End | |
| Within this section you will find: | |
| Give a +Dose | 51 |
| Pause and Resume the Infusion | 55 |
| Ending the Infusion | 59 |
| Disconnecting in an Emergency | 68 |
Give a +Dose (Extra Dose)
| Step 10: Give an Extra Dose (+ Dose) |
An extra dose ( +Dose) is only available if it has been prescribed by the healthcare provider. If an extra dose ( +Dose) has NOT been prescribed, skip this section.
Note:An extra dose ( +Dose) can only be given after the pump has been primed and while the pump is infusing.
Step 10.1 Take the pump. Press the UP ARROW button ( | 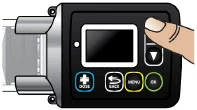 Figure CS |
Step 10.2 Press the +Dose button ( | 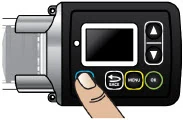 Figure CT |
You will then see the +Dose screen. Press the DOWN ARROW button (  ) to highlight Yes(Figure CU). | 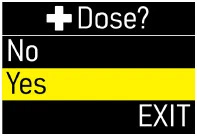 Figure CU |
Step 10.3 Press the OK button ( | Figure CV |
| The pump will now give the extra dose ( +Dose ) (Figure CW). | 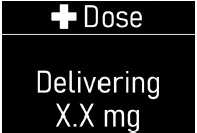 Figure CW |
| When the extra dose is delivered, you will then see the +Dose Delivered screen with a check mark on the bottom (Figure CX). | 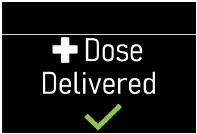 Figure CX |
The pump will then automatically go back to the Infusing screen (Figure CY). Note:Administer extra doses ( +Doses) at least 3 hours apart. Administer no more than 3 extra doses a day. | 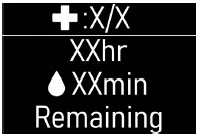 Figure CY |
| Another Way of Giving an Extra Dose (+ Dose) |
| Do notrepeat the steps below if you have already given an extra dose using the +Dose button (  ). |
Take the pump. Press the menu button ( | 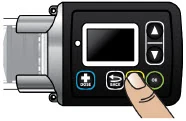 Figure CZ |
| Use the DOWN ARROW button ( ) to highlight Give +Dose (Figure DA). | 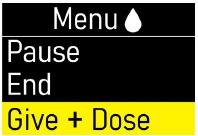 Figure DA |
| Press the OK button ( ) to continue (Figure DB). | Figure DB |
You will then see the +Dose screen. Press the DOWN ARROW button ( | 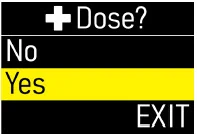 Figure DC |
| Press the OK button ( ) to deliver the extra dose ( +Dose)(Figure DD). | Figure DD |
| Understanding the Extra Dose (+ Dose) Features |
If you see the +Dose Locked icon (Figure DE) on the home screen, it means that an extra dose is not allowed. This is because the minimum amount of time has not passed since the last extra dose ( +Dose) was given. The time between allowable extra doses ( +Doses) is prescribed by the healthcare provider. | 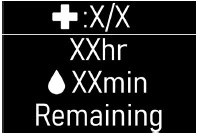 Figure DE |
| When the +Dose is locked, you can see the amount of time remaining before another extra dose ( +Dose) can be given, by pressing the +Dose button ( ) (Figure DF). | 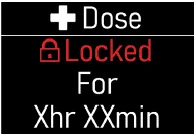 Figure DF |
| If you see the +Dose None Remaining message (Figure DG), it means the maximum number of extra doses has been reached and none remains for that infusion. | 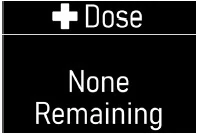 Figure DG |
Pause and Resume the Infusion
If the pump is at risk of getting wet, pause the infusion, disconnect the infusion line from the body, and store the pump in a dry place. This includes swimming, showering, or excessive sweating.
| Step 11: Pausing the Infusion | |
Step 11.1 Take the pump. Press the UP ARROW button ( | 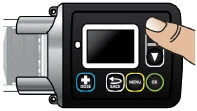 Figure DH |
Step 11.2 Press the MENU button ( | Figure DI |
Step 11.3 Pause option will be highlighted on the Menu screen (Figure DJ). | 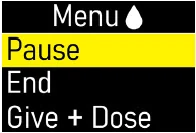 Figure DJ |
Step 11.4 Press the OK button ( | Figure DK |
| You will then see the Paused screen (Figure DL). | Figure DL |
Step 11.5 (If Needed) If needed, remove the infusion line from your body (Figure DM) while leaving cannula on your skin. There is no need to cover the site connector once removed, as it is self-sealing. | 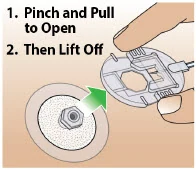 Figure DM |
| Step 12: Resuming the Infusion | |
Step 12.1 (If Needed) Take the site connector end of the infusion line. Reattach the infusion line to the infusion site (Figure DN). | 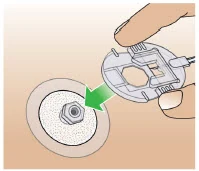 Figure DN |
Step 12.2 Take the pump. Press the UP ARROW button ( | 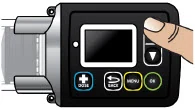 Figure DO |
Step 12.3 Press the MENU button ( | Figure DP |
Step 12.4 Resume option will be highlighted on the Menu screen (Figure DQ). | 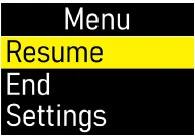 Figure DQ |
Step 12.5 Press the OK button ( | Figure DR |
| You will then see the Infusion Resumed screen with a check mark on the bottom (Figure DS). | 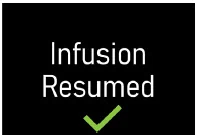 Figure DS |
| The pump will automatically return to the Infusing Screen (Figure DT). | Figure DT |
Ending the Infusion
The infusion will run for the programmed amount of time, or it can be ended early.
| Step 13: Ending the Infusion Early | |
Step 13.1 Take the pump. Press the UP ARROW button ( | 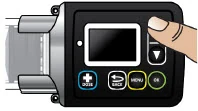 Figure DU |
Step 13.2 Press the MENU button ( | Figure DV |
Step 13.3 Press the DOWN ARROW button ( | 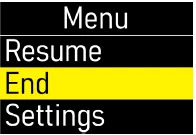 Figure DW |
| Press the OK button ( ) to end the infusion (Figure DX). | Figure DX |
Step 13.4 Press the DOWN ARROW button ( | 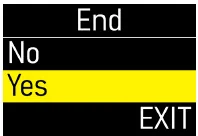 Figure DY |
| Press the OK button ( ) to select Yes(Figure DZ). | Figure DZ |
You will then see the Stop! Remove Line From Body screen (Figure EA). Do notpress the OK button at this time. |  Figure EA |
Step 13.5 Remove the infusion line from the body (Figure EB). | Figure EB |
Step 13.6 Press the OK button ( | Figure EC |
| You will then see the Ending Infusion screen, indicating the ending of the infusion (Figure ED). It may take several minutes to retract the pusher and end the infusion. | 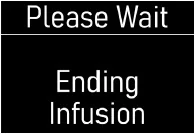 Figure ED |
| When the pump has ended the infusion, you will see the Infusion Off screen (Figure EE). | Figure EE |
Note:If you press the back (  ) button as the infusion is ending, the pusher reset will pause. Press the OK button ( ) to resume ending the infusion and resetting the pusher. | |
Step 13.7 Remove the cannula from the body (Figure EF). | 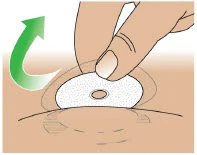 Figure EF |
Step 13.8 Take a new alcohol wipe. Clean the infusion site with a new alcohol wipe (Figure EG). | 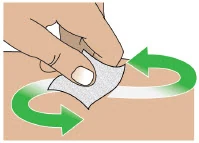 Figure EG |
Step 13.9 Gently massage the area of the infusion site to break up any excess fluid buildup. This will help prevent skin nodules or bumps and irritations (Figure EH). |  Figure EH |
Step 13.10 Take the pump. Twist the assembled cartridge to the left (counterclockwise) and lift it straight up to remove the plastic cartridge holder, glass drug cartridge, and infusion line altogether (Figure EI). | 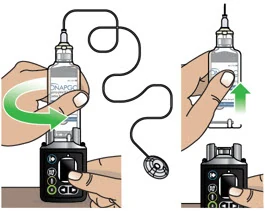 Figure EI |
| Do notseparate the infusion line or the glass drug cartridge from the plastic cartridge holder. |
Note:If the plastic cartridge holder detaches from the glass drug cartridge when removing, continue to remove the plastic cartridge holder. Set aside the plastic cartridge holder and remove the glass drug cartridge by pulling it up and off the pump. Continue to Step 13.11.
Step 13.11 Throw away the used Infusion line, glass drug cartridge, plastic cartridge holder, and cannula into a sharps disposal container right away after use (Figure EJ). Do notthrow away (dispose of) the infusion line, glass drug cartridge, or plastic cartridge holder in your household trash. See the Disposal section on page 73 for information on how to safely throw away ONAPGO. | 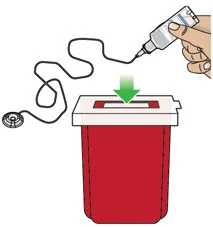 Figure EJ |
Visually Check the Pump Right after you use the pump, look it over (visually check) to see if you notice any soiling on the pump. Wipe off any soiling that you see with a VersaSure ®disinfectant wipe. (See the Clean and Disinfect the Pumpsection on page 74.) |
| Step 14: Ending the Infusion Regularly | |
Step 14.1 At 1 hour, 10 minutes, and 5 minutes remaining in the infusion, the pump will give a reminder on the screen and you will hear occasional beeping (Figure EK). | 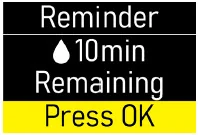 Figure EK |
You must press the OK button ( Note:The 10-minute remaining screen is shown in Figure EK as an example. | Figure EL |
Step 14.2 When the infusion ends, the Ended screen will appear with 0 minutes remaining (Figure EM) and you will hear a beep. | 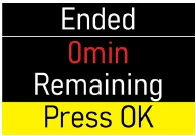 Figure EM |
| Press the OK button ( ) to select Yes(Figure EN). | Figure EN |
Step 14.3 You will then see the Stop! Remove Line From Body screen (Figure EO). Do notpress the OK button at this time. | Figure EO |
Step 14.4 Remove infusion line from the body (Figure EP). | Figure EP |
| The infusion line must be removed from the infusion site before pressing the OK button. |
Step 14.5 Take the pump. Press the OK button ( | Figure EQ |
| The pump will begin to reset, and you will see the Ending Infusion screen (Figure ER). It may take several minutes to retract the pusher and end the infusion. | Figure ER |
| Next, you will see the Infusion Off screen (Figure ES). | Figure ES |
| Note:If you press the back ( ) button as the infusion is ending, the pusher reset will pause. Press the OK button ( ) to resume ending the infusion and resetting the pusher. | |
Step 14.6 Remove the cannula from the body (Figure ET). | Figure ET |
Step 14.7 Take a new alcohol wipe. Clean the infusion site with a new alcohol wipe (Figure EU). | Figure EU |
Step 14.8 Gently massage the area of the infusion site to break up any excess fluid buildup. This will help prevent skin bumps or nodules and irritations (Figure EV). | Figure EV |
Step 14.9 Take the pump. Twist the plastic cartridge holder to the left (counterclockwise) and lift it straight up to remove the plastic cartridge holder, glass drug cartridge, and infusion line (Figure EW). | Figure EW |
| Do notseparate the infusion line or the glass drug cartridge from the plastic cartridge holder. |
| Note:If the plastic cartridge holder detaches from the glass drug cartridge when removing, continue to remove the plastic cartridge holder. Set aside the plastic cartridge holder and remove the glass drug cartridge by pulling it up and off the pump. Continue to Step 14.10. | |
Step 14.10 Put the used infusion line, glass drug cartridge, plastic cartridge holder, and cannula into a sharps disposal container right away after use (Figure EX). Do notthrow away (dispose of) the infusion line, glass drug cartridge, or plastic cartridge holder in your household trash. See the Disposal section on page 73 for information on how to safely throw away ONAPGO. | Figure EX |
Visually Check the Pump Right after you use the pump, look it over (visually check) to see if you notice any soiling. Wipe off any soiling that you see with a VersaSure ®disinfectant wipe. (See the Clean and Disinfect the Pumpsection on page 74.) |
Disconnecting in an Emergency
If you are having a medical emergency, follow the steps below to disconnect from the pump.
| Step 15: Disconnecting in an Emergency | |
Step 15.1 In the United States, dial 9-1-1 from any telephone for immediate medical assistance (Figure EY). | 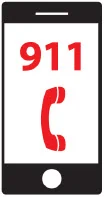 Figure EY |
Step 15.2 Remove the infusion line from your body (Figure EZ). | Figure EZ |
Step 15.3 Follow the Ending the Infusion Earlyinstructions on pages 59 to 63. | |
| Pump Care | |
| Within this section you will find: | |
| Disposal | 73 |
| Cleaning and Disinfecting the Pump | 74 |
| Replacing the Battery | 81 |
Disposal
| Glass Drug Cartridge, Plastic Cartridge Holder, and Infusion Line Disposal | |
| Figure FA |
| Pump Disposal |
At the end of the expected life of the pump, contact Customer Support at 1-833-3ONAPGO (1-833-366-2746) for information and instructions about safe pump disposal.
Cleaning and Disinfecting the Pump
The pump is a reusable device and should be cleaned and disinfected whenever you see any traces of dirt.
Follow the instructions below and on the following pages for cleaning and disinfecting the pump.
| Do notclean and disinfect the pump if it is missing any parts (e.g., battery compartment door) or if you see damage to the front label. |
| The pump is not waterproof. Do notimmerse the pump in liquid. |
| Do notplace the pump under running water. |
| Do notget any liquid inside of the pump. If the pump becomes wet, dry it right away. |
| When cleaning the pump, dry your hands oftento avoid the build-up of liquid on the pump surface. |
| Do notclean the pump with bleach or harsh (abrasive) detergents. |
| Do notsterilize the pump. |
| Do notclean the pump in a dishwasher. |
| Do notdry the pump in a microwave. |
| Step 16: Clean and Disinfect the Pump | |
| Always carefully follow the steps below when cleaning and disinfecting the pump. | |
| Step 16.1 Preparing to Clean the Pump | |
Wash and Dry Your Hands Wash your hands with soap and water, then dry your hands (Figure FB). | Figure FB |
Set Up a Clean Work Area Set up a clean work area on a clean flat surface (Figure FC). |  Figure FC |
Gather Supplies Gather the following supplies (available at most supermarkets and/or pharmacies) (Figure FD):
Optional Supplies:
Note:If you have difficulty finding the supplies to clean your pump, contact your Specialty Pharmacy or Customer Support at 1-833-3ONAPGO (1-833-366-2746). |  Figure FD |
| Do notreuse the disposable gauze when cleaning the pump. Throw away each piece of gauze after use. Make sure to follow the instructions provided by the manufacturers of the detergent and of the VersaSure ®disinfectant wipes. |
| Step 16.2 Thoroughly Clean the Pump with the Toothbrush | |
| Always clean and disinfect the toothbrush each time you clean the pump, or use a new toothbrush each time you clean the pump. Replace the toothbrush if the bristles get worn or dirty. |
Wet the Toothbrush Use the purified or distilled water to slightly moisten the bristles of the toothbrush. | |
Add a Drop of Detergent Add a drop of detergent to the toothbrush. Brush Gently Until Clean Use the toothbrush head to gently brush any areas of the pump that are dirty (Figure FE) until you see the pump is clean. |  Figure FE |
| Do notvigorously scrub the pump with the toothbrush. |
| Step 16.3 Dry the Pump | |
Wipe Dry with Gauze Wipe all areas of the pump with a new dry gauze, to remove excess detergent residue or moisture (Figure FF), then throw away the gauze. Visually Check the Pump Visually check that all dirt and residue have been removed. | 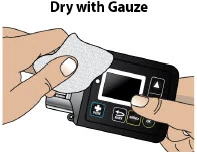 Figure FF |
| Step 16.4 Thoroughly Clean the Pump with Gauze | |
Dampen a Gauze with Detergent andWater Dampen a new gauze with detergent and purified or distilled water. Wipe the Pump with Gauze Wipe the outer surfaces of the pump using the dampened gauze (Figure FG), then throw away the gauze. | 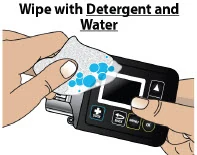 Figure FG |
16.5 Dampen a New Gauze with Water Dampen a new gauze with purified or distilled water. 16.6 Wipe the Pump with Gauze Wipe the outer surfaces of the pump with the dampened gauze to remove any detergent residue (Figure FH), then throw away the gauze. | 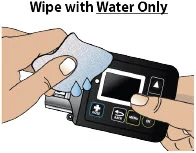 Figure FH |
| Step 16.7 Dry the Pump | |
Wipe Dry with Gauze Dry all areas of the pump with a new dry gauze (Figure FI), then throw away the gauze. | 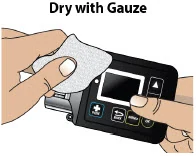 Figure FI |
Visually Check the Pump Visually check the pump for any soiling. Repeat the cleaning process if you see any traces of soiling. | |
| Step 16.8 Disinfect the Pump with a VersaSure ®Disinfectant Wipe | |
| Wipe the outer surfaces of the pump with a VersaSure ®disinfectant wipe for at least 30 seconds(Figure FJ). Throw away the disinfectant wipe after use. | 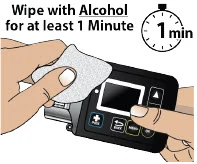 Figure FJ |
| Step 16.9 Let the Pump Air Dry | |
| Set the pump aside on a clean dry surface and let the pump air dry for at least 30 seconds(Figure FK). | 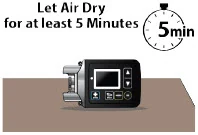 Figure FK |
| Step 16.10 Disinfect the Pump Againwith a VersaSure ®Disinfectant Wipe | |
| Wipe the outer surfaces of the pump againwith a new VersaSure ®disinfectant wipe for at least 30 seconds(Figure FL). Throw away the disinfectant wipe after use. | 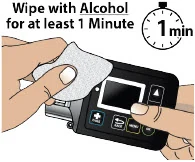 Figure FL |
| Step 16.11 Let the Pump Air Dry | |
| Set the pump aside on a clean dry surface and let the pump air dry for at least 30 seconds(Figure FM). | 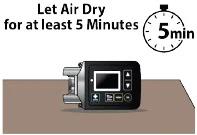 Figure FM |
| Step 16.12 Dry the Pump | |
Wipe Dry with Gauze Dry all areas of the pump with a new dry gauze (Figure FN), then throw away the gauze. Visually Check the Pump Visually inspect the pump to make sure it is clean. | 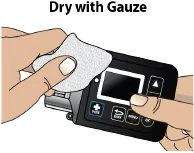 Figure FN |
| If you see any traces of dirt, repeat the entire cleaning and disinfecting procedure. |
| If the pump has not been cleaned for a long period of time, some stains caused by the liquid medicine may not come off during the cleaning and disinfecting process. |
| Maintenance and Repair | |
| If the pump is used correctly as outlined in this Instructions for Use, the pump does not need programmed service maintenance from the manufacturer (CANÈ S.p.A. Medical Technology Company). |
| If the pump stops working, is damaged, or shows a numbered error code, contact your Specialty Pharmacyor Customer Support at 1-833-3ONAPGO (1-833-366-2746). |
Replacing the Battery
Always have a replacement lithium CR123A battery available for use.
| Do notreplace the battery while the infusion line is connected to your body or during an active infusion as this could cause harm. |
| Do notuse a battery other than lithium CR123A. |
| Do notuse expired or rechargeable batteries with the pump. |
| Step 17: Replacing the Battery |
To replace the battery, follow these steps:
Step 17.1 You should see the Infusion Off screen (Figure FP). | 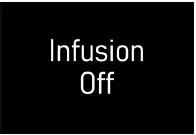 Figure FP |
Step 17.2 Take a new 3-volt lithium battery (model CR 123A) (Figure FQ) and the battery door key (Figure FR). |
|
Step 17.3 Take the battery door key and pump. Insert the battery door key into the battery door keyhole on the bottom of the pump (Figure FS). | 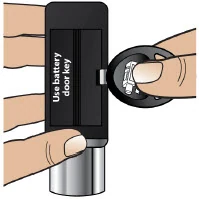 Figure FS |
| Push the battery door key away from the pump (Figure FT) to open the battery door. | 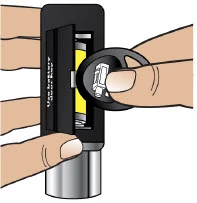 Figure FT |
Step 17.4 Pull the battery door up and all the way out so that the ribbon attached to the battery door pops out the battery (Figure FU). | 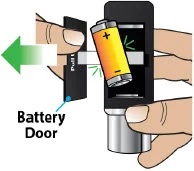 Figure FU |
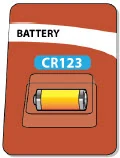 Figure FQ
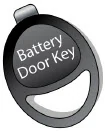 Figure FR
| Do notuse any other object to remove the battery. |
| If the battery does not pop out: | |
| Hold the pump and the battery door firmly in one hand (Figure FV). | 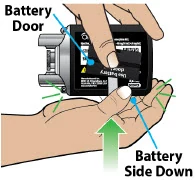 Figure FV |
| Strike the palm of your other hand with the pump, to jolt the battery from the compartment (Figure FW). | 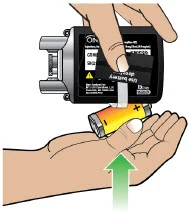 Figure FW |
Step 17.5 Throw away the expired battery per local guidelines (Figure FX). | 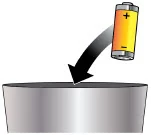 Figure FX |
Step 17.6 Wait 10 seconds before inserting a new battery (Figure FY). This allows the pump to reset. | 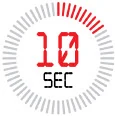 Figure FY |
Step 17.7 Take your new, unopened 3-volt lithium battery, model CR123A (Figure FZ). Open the package. | 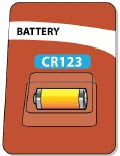 Figure FZ |
Step 17.8 Take the pump. Insert the new battery by placing it on top of the ribbon with the negative end ( -) of the battery towards the silver side of the pump where the plastic cartridge holder is attached, and the positive end ( +) towards the flat end of the pump (Figure GA). Note:The battery should be placed on top of the ribbon to help with future removal and replacement. | 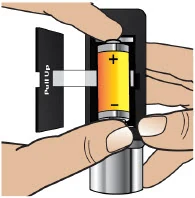 Figure GA |
| Step 17.9 | |
| Close the battery door by pushing it back into place (Figure GB). | 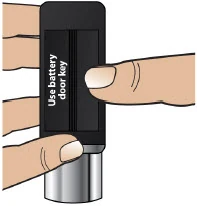 Figure GB |
| You will hear a series of beeps when the new battery is fully inserted (Figure GC). | 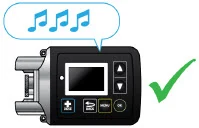 Figure GC |
| The pump screen will wake up and show the logo screen followed by the Infusion Off screen (Figure GD). | Figure GD |
| Alarms & Errors | |
| Within this section you will find: | |
| Error Codes | 91 |
| Troubleshooting | 98 |
Alarms and Troubleshooting
| Error Codes |
An error code will display on the screen if there is something wrong with the pump. You will hear a beep when there is an error code, and the LED next to the screen may light up. The table below gives an overview of the possible error codes that may happen, what they mean, and what to do to fix them.
If the corrective actions provided below do not fix the issue, contact Customer Support at 1-833-3ONAPGO (1-833-366-2746).
| Do nottry to start or continue with your infusion when the screen displays an error. This will help avoid overdose or underdose. |
Blank Screen Error
If a Blank Screen Error occurs, follow the steps below.
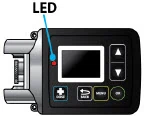 Figure GE
What is happening?
You will hear intermittent beeps. The screen is blank and the LED lights up (Figure GE).
What does it mean?
The pump has detected an error that needs to be addressed.
What to do?
Contact Customer Support at 1-833-3ONAPGO (1-833-366-2746).
Error 2
If Error 2 occurs, follow the steps below.
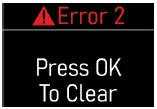 Figure GF
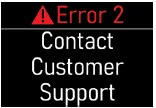 Figure GG
What is happening?
You will hear a continuous tone and the screen will stay on and show a notification (Figure GF) until the error is addressed.
What does it mean?
The pump has detected an error that needs to be addressed.
What to do?
- 1. Press the OK button ( ) to clear the error (Figure GF). The pump will try to fix itself.
- 2. If the error clears, you can continue with your infusion as normal.
- 3. If the error message remains, contact Customer Support at 1-833-3ONAPGO (1-833-366-2746). (Figure GG).
Error 3, Error 5, Error 7
If Error 3, Error 5, or Error 7 occurs, follow the steps below.
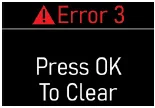 Figure GH
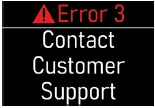 Figure GI
What is happening?
You will hear intermittent beeps. The screen will show a notification (Figure GH) and the LED may light up.
What does it mean?
The pump has detected an error that needs to be addressed.
What to do?
- 1. Press the OK button ( ) to clear the error (Figure GH). The pump will try to fix itself.
- 2. If the error clears, you can continue with your infusion as normal.
- 3. If the error message remains, contact Customer Support at 1-833-3ONAPGO (1-833-366-2746) (Figure GI).
Error 4
If Error 4 occurs, follow the steps below.
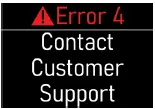 Figure GJ
What is happening?
You will hear intermittent beeps and the screen will stay on and show a notification (Figure GJ) until the error is addressed.
What does it mean?
The pump has detected an error that needs to be addressed.
What to do?
Contact Customer Support at 1-833-3ONAPGO (1-833-366-2746) (Figure GJ).
Error 6, Error 8, Error 9, Error 11
If Error 6, Error 8, Error 9, or Error 11 occurs, follow the steps below.
*Note: Images below show Error 6 as an example. 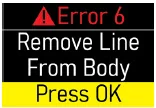 Figure GK
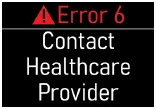 Figure GL
What is happening?
You will hear intermittent beeps and the screen will stay on and show a notification (Figure GK) until the error is addressed.
What does it mean?
The pump has detected an error that needs to be addressed.
What to do?
- 1. If attached to the body, remove the infusion line.
- 2. Press the OK button ( ) to clear the error (Figure GK). The pump will try to fix itself.
- 3. If the error clears, you can continue with your infusion as normal.
- 4. If the error message remains, contact your healthcare provider or clinical nurse navigator (Figure GL).
Blockage
If the Blockage Error occurs, follow the steps below.
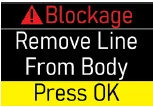 Figure GM
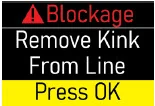 Figure GN
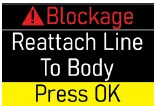 Figure GO
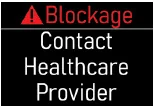 Figure GP
What is happening?
You will hear intermittent beeps and the screen will stay on and show a notification (Figure GM) until the error is addressed.
What does it mean?
Too much pressure has been detected in the infusion line. Something may be blocking the infusion flow.
What to do?
- 1. If attached to the body, remove the infusion line site connector from your body while leaving the cannula connected to your skin (Figure GM). Press the OK button ( ).
- 2. Straighten the infusion line out completely to remove any kinks from the line.
- 3. Make sure the infusion line site connector end is over a sink or a towel before pressing the OK button. After the blockage is cleared, some drug may come out.
- 4. Press the OK button ( ) to clear the error (Figure GN). The pump will try to fix itself.
- 5. If the blockage is cleared, the infusion will continue. Reattach the infusion line to your body and press the OK button ( ) (Figure GO).
- 6. If the error message remains, contact your healthcare provider or clinical nurse navigator (Figure GP).
Warning:If something is blocking the infusion of ONAPGO, such as a kink, be sure to disconnect the infusion line before clearing the blockage alarm. If the infusion line is attached to the body when the error is cleared, you may receive a small additional amount of medicine.
Low Battery
If the Low Battery Alert occurs, follow the steps below.
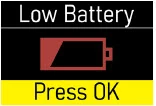 Figure GQ
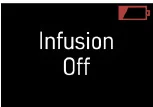 Figure GR
What is happening?
You will hear a beep and see a notification (Figure GQ or Figure GR) on the screen.
What does it mean?
The battery is getting low.
What to do?
During an Infusion (Figure GQ):
- 1. Press the OK button ( ) to clear the alert (Figure GQ).
- 2.
Replace the battery before the next infusion.
See Replacing the Battery section on pages 81 to 85 for detailed instructions.
Not during an Infusion (Figure GR):
- 1. A battery symbol will appear in the top right corner (Figure GR).
- 2.
Replace the battery before next infusion.
See Replacing the Battery section on pages 81 to 85 for detailed instructions on how to replace the pump battery.
Replace Now (Battery Dead)
If the Replace Now Alarm occurs, the battery is dead. Follow the steps below.
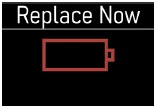 Figure GS
What is happening?
You will see a notification (Figure GS) on screen.
What does it mean?
The battery is dead and must be replaced right away.
Note:The pump will not work if the battery is dead.
What to do?
The screen will show a notification (Figure GS):
- 1.
Before setting up or starting an infusion, replace the battery.
See Replacing the Battery section on pages 81 to 85 for detailed instructions on how to replace the battery.
Note:The alarms have no intentional delays and are raised as soon as the safety system detects the issue.
Note:The pump's firmware keeps the safety system under constant control, and an Error 2 alarm is raised if any issue is detected.
Note:The LED is used only when it is not possible to show the error on the display. The fact that the LED is not used in other alarms does not necessarily mean that they are of a lower priority.
| Troubleshooting: If Your Infusion Line Did Not Prime | |
| Follow the steps below if your infusion line did not prime correctly: | |
| Wake up the pump (if needed) and then repeat the priming procedure. To do this, go to the menu and select Repeat Prime (Figure GT). When priming is complete, continue the procedure by skipping to Step 4.8. | 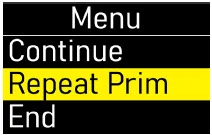 Figure GT |
| If no liquid drops came out of the site connector end after priming two times, select Endon the Menu screen and throw away the infusion line in a sharps disposal container. Then connect a new infusion line and start the priming process again beginning with Step 4.1 on page 33. See the Disposal section on page 73 for information on how to safely throw away ONAPGO. |
Symbols Used on the ONAPGO Pump
 | Caution:Consult accompanying documents for important safety-related information. |
 | CF Applied Part, refer to Technical Manual for more information. |
 | Caution:Consult Instructions for Use. |
 | Do not use in or next to a Magnetic Resonance Imaging (MRI) medical device. |
 | Ingress Protection (IP) rating. Keep pump dry. If wet, wipe off with a dry cloth. The pump must not be immersed in water and must not be used while showering, swimming, or in a sauna. |
 | Prescription device. |
 | Only use the pump with a CR123A battery. |
Technical Characteristics of the Pump
| Dimensions and Weight | |
| Dimensions | 81 mm x 49 mm x 31 mm |
| Dimensions with holder attached | 149 mm x 49 mm x 31 mm |
| Weight | 127 g |
| Technical Data | |
| Power supply | CR123A 3V lithium battery |
| Battery life | Approximately 90 infusions |
| Display | Color OLED 96x64 pixels |
| Ingress protection | IP 42 |
| Buzzer sound pressure level | 53 dBA +/- 5 dBA |
| Data retention | The value settings and counters are retained even without the battery. |
| Maximum service life | Three years from date of purchase. |
| Infusion Data | |
| Note: The information below describes what the pump can do, but it may not be the same as your prescription. | |
| Administrable volume | Max. 20 mL |
| Infusion flow rate range | 1.0 mg/hr to 8.0 mg/hr (drug concentration is 98 mg/20 mL [4.9 mg/mL]) |
| Flow rate programming increment | 0.1 mg/hr |
| Shot volume | 20 μl |
| Extra dose (bolus dose) amount | 0.5 mg to 4.0 mg. May also be set to 0 mg. |
| Bolus dose amount programming increment | 0.1 mg |
| Maximum number of extra dose(s) (bolus doses) per day | 0 to 5 |
| Bolus doses per infusion programming increment | 1 |
| Infusion Time Setting | 1 hr to 24 hr |
| Maximum infusion time programming increment | 1 hr |
| Minimum interval between extra doses (bolus doses) | 3 hr to 24 hr |
| Bolus dose interval programming increment | 30 minutes |
| Bolus dose flow rate | Max. 163 mL/hr |
| Bolus dose accuracy | Low dose 0.5 mg to 1.0 mg +/- 25% High dose 1.5 mg to 4.0 mg +/- 15% |
| Flow rate accuracy | Low flow rate 1.0 mg/hr to 3.5 mg/hr: +/- 15% High flow rate 4.0 mg/hr to 8.0 mg/hr: +/- 10% |
| Maximum difference in height between pump and infusion site | 50 cm |
| Priming volume | Fixed 1 mL (first delivery), 0.6 mL (second delivery) |
| Flow rate during priming | 163 mL/hr |
| Occlusion pressure levels | 2.5 bar +/- 1.5 bar (36 psi +/- 22 psi) |
| Maximum occlusion detection time | at a flow rate of 1mg/hr: 4hr 50min; at a flow rate of 8mg/hr: 32min |
| Post-occlusion bolus | 0.85 mL |
| Factory Settings | |
| Infusion flow rate | 1.0 mg/hr |
| Maximum infusion time | 1 hr |
| Bolus dose amount | 0.0 mg |
| Minimum interval between bolus doses | 3 hr |
| Maximum number of bolus doses per infusion | 0 |
| Environmental Conditions for Use | |
| Temperature | 5°C to 40°C (41°F to 104°F) |
| Relative humidity | 15 to 68% |
| Pressure | 0.7 bar to 1.06 bar (10 psi to 15 psi) |
| Environmental Conditions for Storage | |
| Temperature | -25°C to 70°C (-13°F to 158°F) |
| Relative humidity | Max 68% |
| Pressure | 0.5 bar to 1.06 bar (7 psi to 15 psi) |
Electromagnetic Compatibility
This section prescribes the correct environments for use in accordance with the declared regulations on electromagnetic compatibility.
Reference Standards
The electromagnetic compatibility tests were carried out in accordance with the following standards:
- IEC 60601-2-24:2012 (medical electrical equipment)
- IEC 60601-1-2:2014 (medical electrical equipment)
Electromagnetic Emissions
The manufacturer's declarations and requirements are set out below:
| Emission test | Conformity | Indications regarding electromagnetic environment |
|---|---|---|
| RF emissions CISPR 11 | Group 1 | The pump uses radio frequency only for its internal operation. As a consequence, its RF emissions are very low and would thus not be expected to cause any interference to electronic devices in the vicinity. |
| RF emissions CISPR 11 | Class B | The pump can be used in all environments, including domestic environments that are directly connected to a low-voltage public mains power network. |
Electromagnetic Immunity
The manufacturer's declarations and requirements are set out below:
| Immunity test | Test level | Conformity level | Indications regarding electromagnetic environment |
|---|---|---|---|
| Electrostatic discharge (ESD) IEC 61000-4-2 | 15 kV air 8 kV contact | 15 kV air 8 kV contact | The pump must be used in an environment with wood, concrete or ceramic flooring. Where floors are covered with synthetic material, the relative humidity should be at least 30%. |
| Magnetic fields | 30 A/m 50 and 60 Hz | 30 A/m 50 and 60 Hz | |
| Radiated immunity | 80-2700 MHz AM 80% 1 KHz | 10 V/m | The pump may be subject to interference in the vicinity of devices marked with the following symbol:
|
| IEC 61000-4-3 | 380-390 MHz 18Hz PM 50% | 27 V/m | |
| 430-470 MHz 18Hz PM 50% | 28 V/m | ||
| 704-787 MHz 217Hz PM 50% | 9 V/m | ||
| 800-960 MHz 18Hz PM 50% | 28 V/m | ||
| 1700-1990 MHz 217Hz PM 50% | 28 V/m | ||
| 2400-2570 MHz 217Hz PM 50% | 28 V/m | ||
| 5100-5800 MHz 217Hz PM 50% | 9 V/m |

Recommended Separation Distances from Radio Frequency Devices
Portable radio frequency communication devices (including external antennas and their cables) may interfere with the pump if they are too close to it. These include mobile and cordless phones, LAN routers and intercom systems for children.
To avoid electromagnetic interference, use the pump at a distance at least 30 cm from such devices.
Tests of Accuracy
The accuracy of pump delivery has been evaluated based on tests carried out during an infusion in accordance with the following standards:
- IEC 60601-2-24:2012 (medical electrical equipment)
Note:The pump and drug cartridge have only been tested with Cleo90 infusion set which is recommended for use. Alternative accessories and extensions may cause inaccuracies in flow rate.
The total administrable volume of the drug is a maximum of 20 mL, and the drug concentration is 98 mg/20 mL (4.9 mg/mL). The flow rate programming increment is 0.5 mg per hr. The maximum infusion programming time is in increment of one hour. The accuracy of the pump was tested for a flow rate between 1.0 mg and 8.0 mg per hour. (See the Prescribing Information for recommended dosage). The flow rate stabilizes within minutes from initiation of the infusion, remains stable and delivers accurately for the duration of infusion as described in the technical specifications provided.
Limited Warranty
The pump is covered by a manufacturer's warranty for three (3) years. After this period, the manufacturer shall not be responsible for any repairs.
The manufacturer shall not be liable for damage to persons or property after a pump lifetime of three (3) years.
Contact & Support
For help and additional information on the pump or system, contact Customer Support at 1-833-3ONAPGO (1-833-366-2746).
Manufactured for:
MDD US Operations, LLC
a subsidiary of Supernus
Pharmaceuticals, Inc.
Rockville, MD 20850
MDD US Operations, LLC is the exclusive licensee and distributor of ONAPGO in the United States and its territories.
©2026. ONAPGO is a trademark of BRITUSWIP LTD. Version 16
This Instructions for Use has been approved by the U.S. Food and Drug Administration.
Revised: 6/2026
Healthcare Provider
INSTRUCTIONS FOR USE
ONAPGO™ (on-AP-goh)
This Instructions for Use contains information for healthcare providers on how to program the infusion pump to administer ONAPGO (apomorphine hydrochloride).
Please see the Important Safety Informationsection below, the Full Prescribing Information, and the Patient Informationfor ONAPGO.
MDD US Operations, LLC
| Table of Contents | |
| Table of Contents | 2 |
| ONAPGO Infusion System | 3 |
| Indication for Use | 3 |
| Introduction to the Infusion System | 3 |
| Pump Warnings and Precautions | 4 |
| Pump Kit | 5 |
| Pump Diagram | 5 |
| Pump Screen Icons | 7 |
| Programming the ONAPGO Pump | 8 |
| Settings Overview | 8 |
| Step 1: Access the Pump Settings | 9 |
| Step 2: Enter the Password | 10 |
| Step 3: Program the Pump Settings | 11 |
| Symbols Used on the ONAPGO Pump | 20 |
| Limited Warranty | 21 |
| Contact & Support | 21 |
ONAPGO Infusion System
| Indication for Use |
The ONAPGO Infusion Pump is for the subcutaneous infusion of ONAPGO (apomorphine hydrochloride). ONAPGO is indicated for the treatment of motor fluctuations in adults with advanced Parkinson's disease (PD).
It must be used only by individuals who have received instruction and training on its operations and on the correct, safe procedures. If patients are unable to give treatment independently, they must be given assistance and supervision.
Only the accessories supplied by CANÈ S.p.A. (plastic cartridge holder and supplies provided in the infusion pump kit) may be used in conjunction with this pump. The pump must be programmed by an adequately trained healthcare provider and/or a Supernus Pharmaceuticals/MDD US Operations clinical nurse navigator.
| Introduction to the Infusion System |
Below are the common terms used throughout this Instructions for Use.
- Pump:controls the rate and amount of ONAPGO delivered to the body. It is programmed with the patient's prescription and displays the status of medicine delivery.
- Priming:refers to the task of removing all air from the infusion line (fluid pathway) before the infusion line is connected to the body.
- Flow Rate:the constant flow of ONAPGO given to the body over an extended period of time. The flow rate is expressed as milligrams per hour (mg/hr).
- Infusion Time:the total time that ONAPGO is infused per day.
- Extra Dose (+ Dose):a boost of ONAPGO (bolus dose) given over a short period of time in addition to the prescribed flow rate.
- Extra Dose (+ Dose) Lock:the amount of time before another extra dose can be given.
- Pump Settings:the patient's prescribed Flow Rate, Maximum Infusing Time Per Day, +Dose Quantity, +Dose Volume, and +Dose Lock. These settings can only be changed by a healthcare provider and/or a clinical nurse navigator.
| Pump Warnings and Precautions |
 WARNINGS:
- Do notgive a patient a pump without checking the prescription. Always check that the pump Settings match the patient's prescription before giving the pump to a patient.
- Do notstart an infusion without confirming the patient's prescription. If the pump settings do not match the prescription, do not allow the patient to use the pump. Reprogram the pump to match the prescription.
- Do notgive a patient more than 98 mg of ONAPGO over a 24-hour period.
- Do notdisclose the pump's security codes or other information to the patient. It would allow them access to the programming functions.
- Use ONAPGO drug cartridges with the ONAPGO pump only.
PRECAUTIONS:
- Do notuse sharp objects to press the pump buttons. Only use your fingertips.
- Do notuse a damaged pump. If you have any concerns about the correct functioning of the pump, and/or how to respond to an error contact your customer support representative.
| Pump Kit (Figure A) |
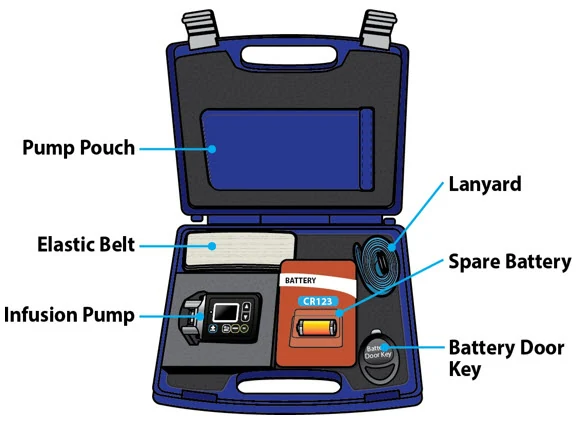
| Pump Diagram (Figures B, C, and D) |
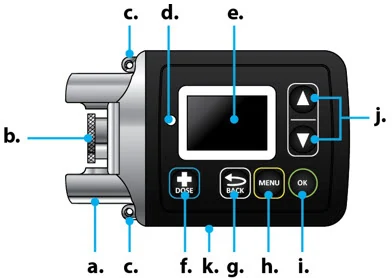 |
All buttons will respond with a single press. If the screen is dark, press the UP ARROW (  ) to wake up the screen.
| Item | Pump Feature | Description |
|---|---|---|
| a | Cartridge Connection | Area where assembled glass drug cartridge and plastic cartridge holder are attached to the pump. |
| b | Pump Pusher | Pushes ONAPGO from the glass drug cartridge into the infusion line. |
| c | Neck Lanyard Clips | Slots to clip on the lanyard. |
| d | LED | Lights up when an error cannot be displayed on the screen. |
| e | Screen | Where messages and menus appear. |
| f |  | +DOSE button gives an extra dose (if prescribed and programmed). |
| g |  | BACK button allows you to return to a previous screen, menu, or cancel an action. |
| h |  | MENU button allows you to access the menus. |
| i |  | OK button allows you to confirm menu selections or go on to the next value. |
| j |  | UP and DOWN ARROW buttons allow you to scroll through menus. |
| k | Battery Door | Door to access the battery. |
| Pump Screen Icons |
The following table shows icons that appear on the pump screen.
| Icon | Name | Description | |
|---|---|---|---|
 | Back Arrow | The back arrow is shown when checking the pump settings. This icon is used to show that pressing the BACK button will return to a previous screen (Item 'g' in Figure B). | |
 | Caution | Caution is shown when an error or alarm is occurring. | |
 | Check Mark | A check mark is shown when the Pump successfully completes a task. | |
 | Droplet | A blinking droplet is shown on the Infusing Screen when an infusion is on. | |
 | Dead Battery | The dead battery is shown when the pump battery is dead and must be replaced. | |
 | Low Battery | The low battery is shown when the pump battery is low and should be replaced before the next infusion. | |
 | OK Arrow | The OK arow is shown when checking the pump settings. This icon is used to show that pressing the OK button will confirm a selection or go on to the next value (Item 'i' in Figure B). | |
 | Padlock | Padlock is shown when the +Dose (extra dose) is not available. |  |
 | Pause | Pause is shown when the infusion is paused. | |
 | +Dose (Extra Dose) | A +symbol refers to the extra dose ( +Dose) function. | |
Programming the ONAPGO Pump
The pump cannot be programmed while infusing.
The pump settings should be programmed according to the patient's prescription before they receive the pump.
| Settings Overview |
When programming the pump, a flashing value is one that you may edit. The table below describes the default pump settings and range of values to which the pump can be programmed. See the Prescribing Information for the recommended dosage regimen, including the recommended flow rate (i.e., 1 mg/hr to 6 mg/hr), infusion time (i.e., generally over 16 waking hours), and extra doses (i.e., no more than 3 per day).
| Icon | Default Pump Setting | Range of Values | Increments | Refer to |
|---|---|---|---|---|
| Time | Factory setting | 12:00 AM - 11:59 PM | N/A | Step 3.1 (p. 11) |
| Date | Factory setting | mm/dd/yy | N/A | Step 3.2 (p. 12) |
| Flow Rate | 1 mg/hr | 1 mg/hr to 8 mg/hr | 0.5 mg/hr | Step 3.3 (p. 13) |
| Infusion Time | 1 hr | 1 hr to 24 hr | 1 hr | Step 3.4 (p. 14) |
+Doses/Day (Extra Doses/Day) | 0 (No Bolus) | 0 to 5 | 1 | Step 3.5 (p. 15) |
| +Dose | 0 mg | 0.5 mg to 4 mg | 0.5 mg | Step 3.6 (p. 16) |
| +Dose Lock | 3 hr | 3 hr to 24 hr | 30 min | Step 3.7 (p. 17) |
| Environmental Conditions for Use | |
| Temperature | 5°C to 40°C (41°F to 104°F) |
| Relative humidity | 15 to 68% |
| Pressure | 0.7 bar to 1.06 bar (10 psi to 15 psi) |
| Environmental Conditions for Storage | |
| Temperature | -25°C to 70°C (-13°F to 158°F) |
| Relative humidity | Max 68% |
| Pressure | 0.5 bar to 1.06 bar (7 psi to 15 psi) |
| Step 1: Access the Pump Settings |
Step 1.1 If the pump screen is asleep, press the UP ARROW ( Note:Do this anytime you need to wake up the pump. | 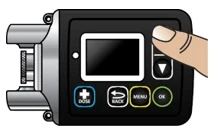 Figure E |
| When the pump wakes up, the screen will say Infusion Off (Figure F). | 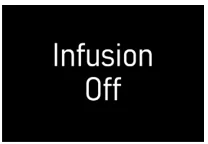 Figure F |
Step 1.2 Press and hold the OK button ( You will hear a series of beeps when holding both the UP ARROW ( | 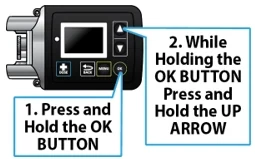 Figure G |
Keep holding both buttons until the password screen appears. You will then see the password screen (Figure H). | 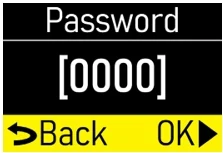 Figure H |
 ) to wake it up (Figure E).
 ). While continuing to hold, press and hold the UP ARROW at the same time (Figure G), until a password input screen appears (Figure H).
 ) and OK button (
 ).
| Step 2: Enter the Password |
Important Information:
 Do notdisclose the pump's security codes or other information to the patient. It would allow them access to the programming functions.
Step 2.1 Locate the 4-digit password on the back of the pump (Figure I). The password is the 4 numbers following 'AJ'. In the example provided (Figure I), the 4-digit password would be 0001. | 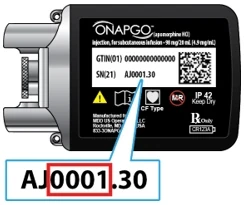 HCP password on back of pump Figure I |
Step 2.2 Use the UP AND DOWN ARROWS ( | 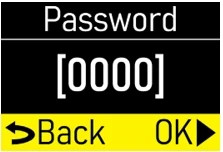 Figure J |
When the correct password has been entered, press the OK button ( Note:If incorrect password is entered, the pump will go to the Infusion Off screen. Repeat steps 2.1 and 2.2 (above) with the correct password. | 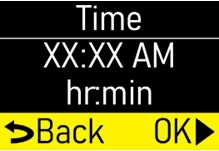 Figure K |
 ) to change the values on the Password screen (Figure J). Flashing values indicate that they are currently being edited. When the selected number matches the pump password, press the OK button (
 ) to proceed to the next number. Repeat this process for all 4 numbers.
 ) to proceed to the Time screen (Figure K).
| Step 3: Program the Pump Settings |
If this is the first time the pump will be programmed, the existing values will reflect the default factory settings (Page 8).
For any subsequent programming, the values will reflect the previously programmed patient prescription.
The settings will need to be changed to match the time, date, and patient's prescription.
Step 3.1 Use the UP and DOWN ARROWS ( | 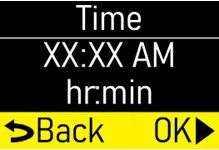 Figure L |
When the Time is correct, press the OK button (  ) to proceed to the Date screen (Figure M) Step 3.2. | 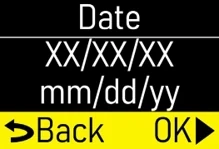 Figure M |
Step 3.2 Use the UP and DOWN ARROWS ( | 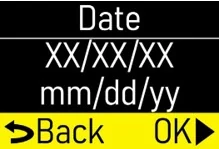 Figure N |
When the date is correct, press the OK button (  ) to proceed to the Flow Rate screen (Figure O) Step 3.3. | 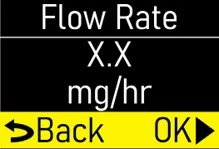 Figure O |
Step 3.3 Use the UP and DOWN ARROWS ( | 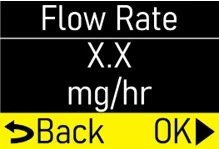 Figure P |
| When the flow rate is correct, press the OK button ( ) to proceed to the Infusion Time screen (Figure Q) Step 3.4. | 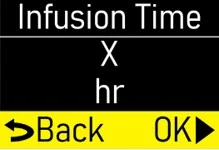 Figure Q |
Note:If you are prescribing above the recommended flow rate, a Verify screen will appear (Figure R). Press the OK button ( | 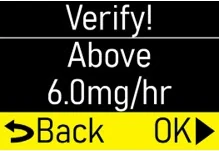 Figure R |
Step 3.4 Use the UP and DOWN ARROWS ( | 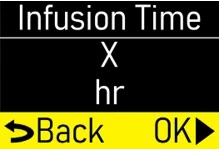 Figure S |
| When the infusion time is correct, press the OK button ( ) to proceed to the + Doses/Day (extra doses/day) screen (Figure T) Step 3.5. | 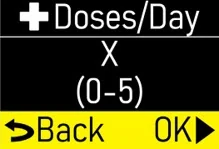 Figure T |
Note:If you are prescribing above the recommended infusion time, a Verify screen will appear (Figure U). Press the OK button ( | 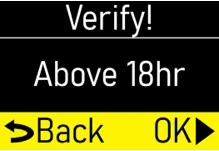 Figure U |
Step 3.5 Use the UP and DOWN ARROWS ( Note:If no +dose (extra dose) is prescribed, enter '0' for the number of +Doses/Day (extra doses/ day) and press the OK button ( | 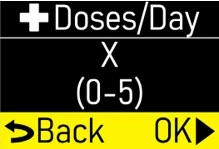 Figure V |
| When the +Doses/Day (extra doses/ day) number is correct, press the OK button ( ) to proceed to the +Dose screen (Figure W) Step 3.6. | 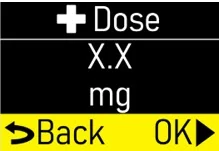 Figure W |
Note:If you are prescribing above the recommended +Doses/Day, a Verify screen will appear (Figure X). Press the OK button ( | 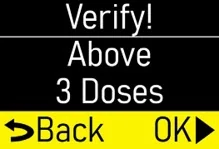 Figure X |
Step 3.6 Use the UP and DOWN ARROWS ( Note:If no extra doses are prescribed, the +Dose value cannot be changed. Press the OK button ( | 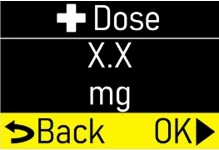 Figure Y |
When the +Dose (extra dose) value is correct, press the OK button (  ) to proceed to the +Dose Lock screen (Figure Z) Step 3.7. | 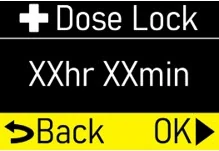 Figure Z |
Note:If you are prescribing above the recommended extra doses, a Verify screen will appear (Figure AA). Press the OK button ( ) to proceed or press the BACK button (  ) to edit the +Dose (extra dose). | 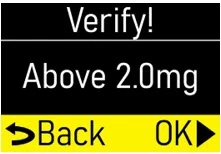 Figure AA |
Step 3.7 Use the UP and DOWN ARROWS ( Note:If no extra doses are prescribed, the + Dose (extra dose) lock time cannot be changed. Press the OK button ( | 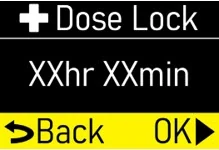 Figure AB |
| When the + Dose (extra dose) lock time is correct, press the OK button ( ) to proceed to the Verify Rx screen (Figure AC) Step 3.8. | 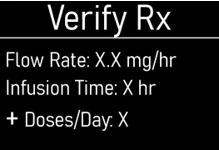 Figure AC |
Step 3.8 When the Verify Rx screen appears (Figure AD), press the DOWN ARROW ( | 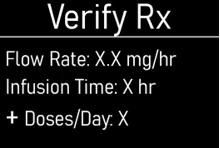 Figure AD |
Continue pressing the DOWN ARROW (  ) until the Back/OK row is highlighted (Figure AE). | 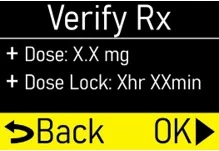 Figure AE |
Step 3.9 If the programmed pump settings match the patient's prescription, press the OK button ( Note:If any of the programmed pump settings do not match the patient's prescription, use the BACK button ( | 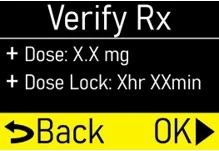 Figure AF |
When the pump is done saving, the Infusion Off screen will appear (Figure AG). Note:If the OK button is not pressed and the pump screen falls asleep (goes dark), the programmed pump settings will still be saved. | 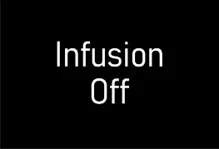 Figure AG |
 ) to change the hour. As the hour is adjusted, the AM and PM will also change. When the hour and AM/PM are correct, press the OK button (
 ) to change the month and press the OK button (
 ) to edit the flow rate.
Symbols Used on the ONAPGO Pump
 | Caution:Consult accompanying documents for important safety-related information. |
 | CF Applied Part, refer to Technical Manual for more information. |
 | Caution:Consult Instructions for Use. |
 | Do not use in or next to a Magnetic Resonance Imaging (MRI) medical device. |
 | Ingress Protection (IP) rating. Keep pump dry. If wet, wipe off with a dry cloth. The pump must not be immersed in water and must not be used while showering, swimming, or in a sauna. |
 | Prescription device. |
 | The pump is to only be used with a CR123A battery. |
Note:The symbols displayed on the product label are reduced and simplified compared to the specifications in the reference standard CENELEC EN50419.
Limited Warranty
The pump is covered by a manufacturer's warranty for three (3) years. After this period, the manufacturer shall not be responsible for any repairs.
The manufacturer shall not be liable for damage to persons or property after a pump lifetime of three (3) years.
Contact & Support
For help and additional information on the pump or system, contact Customer Support at 1-833-3ONAPGO (1-833-366-2746).
Manufactured for:
MDD US Operations, LLC a
subsidiary of Supernus Pharmaceuticals, Inc.
Rockville, MD 20850
MDD US Operations, LLC is the exclusive licensee and distributor of ONAPGO in the United States and its territories.
©2026. ONAPGO is a trademark of BRITUSWIP LTD. Version 10
This Instructions for Use has been approved by the U.S. Food and Drug Administration.
Revised: 6/2026